
Introduction:
At times, certain project specifications demand comprehensive testing of a web application across a diverse range of web browsers and their varying versions. Maintaining consistent functionality, visual appearance, and user engagement is essential.
To execute this type of cross-browser testing efficiently, there are two primary approaches:
- One involves manual testing, where the website is examined across multiple browsers and devices.
- The other approach entails leveraging specialized tools and services that replicate distinct browser environments.
Particularly, BrowserStack stands out as a tool that has garnered considerable attention in this field, thanks to its intuitive user interface.
Executing test cases on BrowserStack is crucial for QA teams to ensure the compatibility, functionality, and performance of websites and applications across a wide range of real browsers and devices.
It helps identify bugs, responsive design issues, and user experience problems, while also supporting automated testing and real environment testing.
BrowserStack eliminates the need for local testing infrastructure, reducing costs and enhancing overall testing efficiency.
So first let’s talk about the Basic Framework where we can automate test cases using the BDD approach to execute tests on a browser on the local machine.
So for this instead of explaining it from scratch here again, You can explore my blog where I have explained How to create a BDD automation framework using Cucumber in JavaScript and Playwright.
This blog gives you step-by-step guidance on how to Create Feature files, Steps files, Page Files, and various other utilities to make the framework more reusable and robust. So here is the link to this blog: https://shorturl.at/bjuvU
You can also use the below link to access the BDD automation framework using Cucumber in JavaScript: https://github.com/spurqlabs/Playwright_JS_BDD_Framework
Pre-requisite:
- You must have a BrowserStack account to execute your tests, to create a new BrowserStack account you can visit the below link. https://www.browserstack.com/users/sign_up
To get started with BrowserStack implementation first store your BrowserStack username and access key in the .env file.
To get the username and access key to navigate to your BrowserStack account. Click on Access key dropdown from dashboard and you will be able to see your username and access key.

Here you will be able to see your account details. Copy your Username and Access Key and store it in a .env file as shown below. To execute tests on BrowserStack set the Browserstack variable to ‘true’.
Browserstack = true
BROWSERSTACK_USERNAME='browserstack_usename'
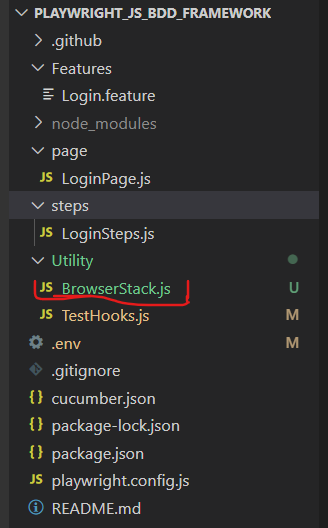
BROWSERSTACK_ACCESS_KEY='browserstack_accessKey'Now to set BrowserStack configurations Create a file as “Browserstack.js”, as you can see I have created a “Browserstack.js file” in the Utility folder.
Here are the essential BrowserStack configurations to integrate into this file.
const cp = require('child_process')
const playwrightClientVersion = cp
    .execSync('npx playwright --version')
    .toString()
    .trim()
    .split(' ')[1]
function caps() {
    return {
        'browser': 'playwright-chromium',
        'os': 'Windows',
        'os_version': '10',
        'browserstack.username': process.env.BROWSERSTACK_USERNAME,
        'browserstack.accessKey': process.env.BROWSERSTACK_ACCESS_KEY,
        'client.playwrightVersion': playwrightClientVersion
    }
}
module.exports = { caps }
.execSync('npx playwright --version')
    .toString()
    .trim()
    .split(' ')[1]
.execSync:
The playwrightClientVersion variable is declared and assigned the output of the shell command executed using execSync from the child_process module.
.execSync('npx playwright --version’):The command executed is npx playwright –version, which retrieves the version of the Playwright framework installed on the system. The output is converted to a string, trimmed to remove leading or trailing whitespace, and then split into an array based on spaces. The second element of the array (split(‘ ‘)[1]) represents the Playwright’s version.
caps():
This function is responsible for generating a configuration object used for browser testing with the BrowserStack platform and Playwright framework. It returns an object that contains configuration options for browser testing like browser, os, os_version, etc.
process.env.BROWSERSTACK_USERNAME, process.env.BROWSERSTACK_ACCESS_KEY:
These are the variables from the .env file. If you are not using a .env file you can directly pass the BrowserStack username and access key.
As we have all the configurations ready, we will set up a test environment to execute tests on BrowserStack. Use the file where you have your Before and After methods. In the playwright-Js Framework we have these methods stored in the ‘TestHooks.js file’ so will update that file as below.
const { Before, AfterAll } = require('@cucumber/cucumber')
const page = require('@playwright/test')
const path = require('path');
const { chromium } = require('playwright')
require('dotenv').config({
  path: path.join(__dirname, '../.env'),
});
Before(async (scenario) => {
  if (process.env.BrowserStack === 'true') {
    try {
      const capabilitiesBr = require('./BrowserStack').caps(scenario)
      global.browser = await chromium.connect({
        wsEndpoint: `wss://cdp.browserstack.com/playwright?caps=${encodeURIComponent(JSON.stringify(capabilitiesBr))}`,
      })
      viewport = {
        width: 1920,
        height: 900,
      }
    } catch (e)
      console.error('Error connecting to BrowserStack', e)
    }
  } else {
    global.browser = await page.chromium.launch({ headless: false })
  }
  const context = await browser.newContext()
  global.page = await context.newPage()
})
AfterAll(async () => {
  await global.browser.close()
})
The above code Generates capabilities for BrowserStack using the caps() function from the ‘BrowserStack’ module. Construct the WebSocket endpoint URL for BrowserStack with the generated capabilities.
Now we have completed the BrowserStack implementation in our framework, now you can execute your tests on BrowserStack.
To execute tests on BrowserStack make sure you have “Browserstack = true” in the .env file.

Then you can execute your tests using the command ’npm run test’ on your terminal.

After running the test cases on BrowserStack, you’ll find the report below. Access comprehensive execution videos, and test logs for both successful and unsuccessful cases, along with execution duration.

Conclusion:
Integrating BrowserStack with Playwright JavaScript tests, gives access to a wide range of real browsers and devices, enabling comprehensive cross-browser and cross-platform testing. The scalability and cost-effectiveness of BrowserStack eliminate the need for maintaining an extensive device lab. Ultimately, this integration enhances test coverage, improves software quality, and ensures a seamless user experience across various browsers and platforms.
4Priyanka is an SDET with 1+ years of hands-on experience in Manual, Automation, and API testing. The technologies she has worked on include Selenium, Playwright, Cucumber, Appium, Postman, SQL, GitHub, and Java. Also, she is interested in Blog writing and learning new technologies.