API Automation Testing Framework – In Today’s fast-paced digital ecosystem, almost every modern application relies on APIs (Application Programming Interfaces) to function seamlessly. Whether it’s a social media integration pulling live updates, a payment gateway processing transaction, or a data service exchanging real-time information, APIs act as the invisible backbone that connects various systems together.
Because APIs serve as the foundation of all interconnected software, ensuring that they are reliable, secure, and high performing is absolutely critical. Even a minor API failure can impact multiple dependent systems; consequently, it may cause application downtime, data mismatches, or even financial loss.
That’s where API automation testing framework comes in. Unlike traditional UI testing, API testing validates the core business logic directly at the backend layer, which makes it faster, more stable, and capable of detecting issues early in the development cycle — even before the frontend is ready.
In this blog, we’ll walk through the process of building a complete API Automation Testing Framework using a combination of:
Java – as the main programming language
Maven – for project and dependency management
Cucumber – to implement Behavior Driven Development (BDD)
RestAssured – for simplifying RESTful API automation
Playwright – to handle browser-based token generation
The framework you’ll learn to build will follow a BDD (Behavior-Driven Development) approach, enabling test scenarios to be written in simple, human-readable language. This not only improves collaboration between developers, testers, and business analysts but also makes test cases easier to understand, maintain, and extend.
Additionally, the API automation testing framework will be CI/CD-friendly, meaning it can be seamlessly integrated into automated build pipelines for continuous testing and faster feedback.
By the end of this guide, you’ll have a scalable, reusable, and maintainable API testing framework that brings together the best of automation, reporting, and real-time token management — a complete solution for modern QA teams.
What is API?
An API (Application Programming Interface) acts as a communication bridge between two software systems, allowing them to exchange information in a standardized way. In simpler terms, it defines how different software components should interact — through a set of rules, protocols, and endpoints.
Think of an API as a messenger that takes a request from one system, delivers it to another system, and then brings back the response. This interaction, therefore, allows applications to share data and functionality without exposing their internal logic or database structure.
Let’s take a simple example: When you open a weather application on your phone, it doesn’t store weather data itself. Instead, it sends a request to a weather server API, which processes the request and sends back a response — such as the current temperature, humidity, or forecast. This request-response cycle is what makes APIs so powerful and integral to almost every digital experience we use today.
Most modern APIs follow the REST (Representational State Transfer) architectural style. REST APIs use the HTTP protocol and are designed around a set of standardized operations, including:
HTTP Method
Description
Example Use
GET
Retrieve data from the server
Fetch a list of users
POST
Create new data on the server
Add a new product
PUT
Update existing data
edit user details
DELETE
Remove data
Delete a record
The responses returned by API’s are typically in JSON (JavaScript Object Notation) format – a lightweight, human-readable, and machine-friendly data format that’s easy to parse and validate.
In essence, API’s are the digital glue that holds modern applications together — enabling smooth communication, faster integrations, and a consistent flow of information across systems.
What is API Testing?
API Testing is the process of verifying that an API functions correctly and performs as expected — ensuring that all its endpoints, parameters, and data exchanges behave according to defined business rules.
In simple terms, it’s about checking whether the backend logic of an application works properly — without needing a graphical user interface (UI). Since APIs act as the communication layer between different software components, testing them helps ensure that the entire system remains reliable, secure, and efficient.
API testing typically focuses on four main aspects:
Functionality – Does the API perform the intended operation and return the correct response for valid requests?
Reliability – Does it deliver consistent results every time, even under different inputs and conditions?
Security – Is the API protected from unauthorized access, data leaks, or token misuse?
Performance – Does it respond quickly and remain stable under heavy load or high traffic?
Unlike traditional UI testing, which validates the visual and interactive parts of an application, API testing operates directly at the business logic layer. This makes it:
Faster – Since it bypasses the UI, execution times are much shorter.
More Stable – UI changes (like a button name or layout) don’t affect API tests.
Proactive – Tests can be created and run even before the front-end is developed.
In essence, API testing ensures the heart of your application is healthy. By validating responses, performance, and security at the API level, teams can detect defects early, reduce costs, and deliver more reliable software to users.
Why is API Testing Important?
API Testing plays a vital role in modern software development because APIs form the backbone of most applications. A failure in an API can affect multiple systems and impact overall functionality.
Here’s why API testing is important:
Ensures Functionality: Verifies that endpoints return correct responses and handle errors properly.
Enhances Security: Detects vulnerabilities like unauthorized access or token misuse.
Validates Data Integrity: Confirms that data remains consistent across APIs and databases.
Improves Performance: Checks response time, stability, and behavior under load.
Detects Defects Early: Allows early testing right after backend development, saving time and cost
Supports Continuous Integration: Easily integrates with CI/CD pipelines for automated validation.
In short, API testing ensures your system’s core logic is reliable, secure, and ready for real-world use.
Tools for Manual API Testing
Before jumping into automation, it’s essential to explore and understand APIs manually. Manual testing helps you validate endpoints, check responses, and get familiar with request structures.
Here are some popular tools used for manual API testing:
Postman: The most widely used tool for sending API requests, validating responses, and organizing test collections [refer link – https://www.postman.com/.
SoapUI: Best suited for testing both SOAP and REST APIs with advanced features like assertions and mock services.
Insomnia: A lightweight and user-friendly alternative to Postman, ideal for quick API exploration.
cURL: A command-line tool perfect for making fast API calls or testing from scripts.
Fiddler: Excellent for capturing and debugging HTTP/HTTPS traffic between client and server.
Using these tools helps testers understand API behavior, request/response formats, and possible edge cases — forming a strong foundation before moving to API automation.
Tools for API Automation Testing
After verifying APIs manually, the next step is to automate them using reliable tools and libraries. Automation helps improve test coverage, consistency, and execution speed.
Here are some popular tools used for API automation testing:
RestAssured: A powerful Java library designed specifically for testing and validating RESTful APIs.
Cucumber: Enables writing test cases in Gherkin syntax (plain English), making them easy to read and maintain.
Playwright: Automates browser interactions; in our framework, it will be used for token generation or authentication flows.
Postman + Newman: Allows you to run Postman collections directly from the command line — ideal for CI/CD integration.
JMeter: A robust tool for performance and load testing of APIs under different conditions.
In this blog, our focus will be on building a framework using RestAssured, Cucumber, and Playwright — combining functional, BDD, and authentication automation into one cohesive setup.
Framework Overview
We’ll build a Behavior-Driven API Automation Testing Framework that combines multiple tools for a complete testing solution. Here’s how each component fits in:
Cucumber – Manages the BDD layer, allowing test scenarios to be written in simple, readable feature files.
RestAssured – Handles HTTP requests and responses for validating RESTful APIs.
Playwright – Automates browser-based actions like token generation or authentication.
Maven – Manages project dependencies, builds, and plugins efficiently.
Cucumber HTML Reports – Automatically generates detailed execution reports after each run.
The framework follows a modular structure, with separate packages for step definitions, utilities, configurations, and feature files — ensuring clean organization, easy maintenance, and scalability.
In this, we will be creating a feature file for API Automation Testing Framework. A feature file consists of steps. These steps are mentioned in the gherkin language. The feature is easy to understand and can be written in the English language so that a non-technical person can understand the flow of the test scenario. In this framework we will be automating the four basic API request methods i.e. POST, PUT, GET and DELETE.
We can assign tags to our scenarios mentioned in the feature file to run particular test scenarios based on the requirement. The key point you must notice here is the feature file should end with .feature extension. We will be creating four different scenarios for the four different API methods.
Feature: All Notes API Validation

  @api

  Scenario Outline: Validate POST Create Notes API Response for "<scenarioName>" Scenario
    When User sends "<method>" request to "<url>" with headers "<headers>" and query file "<queryFile>" and requestDataFile  "<bodyFile>"
    Then User verifies the response status code is <statusCode>
    And User verifies the response body matches JSON schema "<schemaFile>"
    Then User verifies fields in response: "<contentType>" with content type "<fields>"
    Examples:
      | scenarioName       | method | url                                                             | headers | queryFile | bodyFile             | statusCode | schemaFile | contentType | fields |
      | Valid create Notes | POST   | /api/v1/loan-syndications/{dealId}/investors/{investorId}/notes | NA      | NA        | Create_Notes_Request | 200        | NA         | NA          | NA     |

  Scenario Outline: Validate GET Notes API Response for "<scenarioName>" Scenario
    When User sends "<method>" request to "<url>" with headers "<headers>" and query file "<queryFile>" and requestDataFile "<bodyFile>"
    Then User verifies the response status code is <statusCode>
    And User verifies the response body matches JSON schema "<schemaFile>"
    Then User verifies fields in response: "<contentType>" with content type "<fields>"
    Examples:
      | scenarioName    | method | url                                                             | headers | queryFile | bodyFile | statusCode | schemaFile       | contentType | fields              |
      | Valid Get Notes | GET    | /api/v1/loan-syndications/{dealId}/investors/{investorId}/notes | NA      | NA        | NA       | 200        | Notes_Schema_200 | json        | note=This is Note 1 |

  Scenario Outline: Validate Update Notes API Response for "<scenarioName>" Scenario
    When User sends "<method>" request to "<url>" with headers "<headers>" and query file "<queryFile>" and requestDataFile "<bodyFile>"
    Then User verifies the response status code is <statusCode>
    And User verifies the response body matches JSON schema "<schemaFile>"
    Then User verifies fields in response: "<contentType>" with content type "<fields>"
    Examples:
      | scenarioName       | method | url                                                                                   | headers | queryFile | bodyFile             | statusCode | schemaFile | contentType | fields |
      | Valid update Notes | PUT    | /api/v1/loan-syndications/{dealId}/investors/{investorId}/notes/{noteId}/update-notes | NA      | NA        | Update_Notes_Request | 200        | NA         | NA          | NA     |

  Scenario Outline: Validate DELETE Create Notes API Response for "<scenarioName>" Scenario
    When User sends "<method>" request to "<url>" with headers "<headers>" and query file "<queryFile>" and requestDataFile "<bodyFile>"
    Then User verifies the response status code is <statusCode>
    And User verifies the response body matches JSON schema "<schemaFile>"
    Then User verifies fields in response: "<contentType>" with content type "<fields>"
    Examples:
      | scenarioName | method | url                                                                      | headers | queryFile | bodyFile | statusCode | schemaFile | contentType | fields |
      | Valid delete | DELETE | /api/v1/loan-syndications/{dealId}/investors/{investorId}/notes/{noteId} | NA      | NA        | NA       | 200        | NA         | NA          | NA     |
Step 4: Creating a Step Definition File
Unlike the automation framework which we have built in the previous blog, we will be creating a single-step file for all the feature files. In the BDD framework, the step files are used to map and implement the steps described in the feature file. Rest Assured library is very accurate to map the steps with the steps described in the feature file. We will be describing the same steps in the step file as they have described in the feature file so that behave will come to know the step implementation for the particular steps present in the feature file.
package org.Spurqlabs.Steps;

import io.cucumber.java.en.Then;
import io.cucumber.java.en.When;
import io.restassured.response.Response;
import org.Spurqlabs.Core.TestContext;
import org.Spurqlabs.Utils.*;
import org.json.JSONArray;
import org.json.JSONObject;

import java.io.File;
import java.io.IOException;
import java.nio.charset.StandardCharsets;
import java.nio.file.Files;
import java.nio.file.Paths;
import java.util.HashMap;
import java.util.Map;

import static io.restassured.module.jsv.JsonSchemaValidator.matchesJsonSchemaInClasspath;
import static org.Spurqlabs.Utils.DealDetailsManager.replacePlaceholders;
import static org.hamcrest.Matchers.equalTo;
public class CommonSteps extends TestContext {
    private Response response;

    @When("User sends {string} request to {string} with headers {string} and query file {string} and requestDataFile {string}")
    public void user_sends_request_to_with_query_file_and_requestDataFile (String method, String url, String headers, String queryFile, String bodyFile) throws IOException {
        String jsonString = Files.readString(Paths.get(FrameworkConfigReader.getFrameworkConfig("DealDetails")), StandardCharsets.UTF_8);
        JSONObject storedValues = new JSONObject(jsonString);

        String fullUrl = FrameworkConfigReader.getFrameworkConfig("BaseUrl") + replacePlaceholders(url);

        Map<String, String> header = new HashMap<>();
        if (!"NA".equalsIgnoreCase(headers)) {
            header = JsonFileReader.getHeadersFromJson(FrameworkConfigReader.getFrameworkConfig("headers") + headers + ".json");
        } else {
            header.put("cookie", TokenManager.getToken());
        }
        Map<String, String> queryParams = new HashMap<>();
        if (!"NA".equalsIgnoreCase(queryFile)) {
            queryParams = JsonFileReader.getQueryParamsFromJson(FrameworkConfigReader.getFrameworkConfig("Query_Parameters") + queryFile + ".json");
            for (String key : queryParams.keySet()) {
                String value = queryParams.get(key);
                for (String storedKey : storedValues.keySet()) {
                    value = value.replace("{" + storedKey + "}", storedValues.getString(storedKey));
                }
                queryParams.put(key, value);
            }
        }

        Object requestBody = null;
        if (!"NA".equalsIgnoreCase(bodyFile)) {
            String bodyTemplate = JsonFileReader.getJsonAsString(
                    FrameworkConfigReader.getFrameworkConfig("Request_Bodies") + bodyFile + ".json");

            for (String key : storedValues.keySet()) {
                String placeholder = "{" + key + "}";
                if (bodyTemplate.contains(placeholder)) {
                    bodyTemplate = bodyTemplate.replace(placeholder, storedValues.getString(key));
                }
            }

            requestBody = bodyTemplate;
        }

        response = APIUtility.sendRequest(method, fullUrl, header, queryParams, requestBody);
        response.prettyPrint();
        TestContextLogger.scenarioLog("API", "Request sent: " + method + " " + fullUrl);

        if (scenarioName.contains("GET Notes") && response.getStatusCode() == 200) {
            DealDetailsManager.put("noteId", response.path("[0].id"));
        }

    }

    @Then("User verifies the response status code is {int}")
    public void userVerifiesTheResponseStatusCodeIsStatusCode(int statusCode) {
        response.then().statusCode(statusCode);
        TestContextLogger.scenarioLog("API", "Response status code: " + statusCode);
    }

    @Then("User verifies the response body matches JSON schema {string}")
    public void userVerifiesTheResponseBodyMatchesJSONSchema(String schemaFile) {
        if (!"NA".equalsIgnoreCase(schemaFile)) {
            String schemaPath = "Schema/" + schemaFile + ".json";
            response.then().assertThat().body(matchesJsonSchemaInClasspath(schemaPath));
            TestContextLogger.scenarioLog("API", "Response body matches schema");
        } else {
            TestContextLogger.scenarioLog("API", "Response body does not have schema to validate");
        }
    }

    @Then("User verifies field {string} has value {string}")
    public void userVerifiesFieldHasValue(String jsonPath, String expectedValue) {
        response.then().body(jsonPath, equalTo(expectedValue));
        TestContextLogger.scenarioLog("API", "Field " + jsonPath + " has value: " + expectedValue);
    }

    @Then("User verifies fields in response: {string} with content type {string}")
    public void userVerifiesFieldsInResponseWithContentType(String contentType, String fields) throws IOException {
        // If NA, skip verification
        if ("NA".equalsIgnoreCase(contentType) || "NA".equalsIgnoreCase(fields)) {
            return;
        }
        String responseStr = response.getBody().asString().trim();

        try {
            if ("text".equalsIgnoreCase(contentType)) {
                // For text, verify each expected value is present in response
                for (String expected : fields.split(";")) {
                    expected = replacePlaceholders(expected.trim());
                    if (!responseStr.contains(expected)) {
                        throw new AssertionError("Expected text not found: " + expected);
                    }
                    TestContextLogger.scenarioLog("API", "Text found: " + expected);
                }
            } else if ("json".equalsIgnoreCase(contentType)) {
                // For json, verify key=value pairs
                JSONObject jsonResponse;
                if (responseStr.startsWith("[")) {
                    JSONArray arr = new JSONArray(responseStr);
                    jsonResponse = !arr.isEmpty() ? arr.getJSONObject(0) : new JSONObject();
                } else {
                    jsonResponse = new JSONObject(responseStr);
                }
                for (String pair : fields.split(";")) {
                    if (pair.trim().isEmpty()) continue;
                    String[] kv = pair.split("=", 2);
                    if (kv.length < 2) continue;
                    String keyPath = kv[0].trim();
                    String expected = replacePlaceholders(kv[1].trim());
                    Object actual = JsonFileReader.getJsonValueByPath(jsonResponse, keyPath);
                    if (actual == null) {
                        throw new AssertionError("Key not found in JSON: " + keyPath);
                    }
                    if (!String.valueOf(actual).equals(String.valueOf(expected))) {
                        throw new AssertionError("Mismatch for " + keyPath + ": expected '" + expected + "', got '" + actual + "'");
                    }
                    TestContextLogger.scenarioLog("API", "Validated: " + keyPath + " = " + expected);
                }
            } else {
                throw new AssertionError("Unsupported content type: " + contentType);
            }
        } catch (AssertionError | Exception e) {
            TestContextLogger.scenarioLog("API", "Validation failed: " + e.getMessage());
            throw e;
        }
    }
Step 5: Creating API
Till now we have successfully created a feature file and a step file now in this step we will be creating a utility file. Generally, in Web automation, we have page files that contain the locators and the actions to perform on the web elements but in this framework, we will be creating a single utility file just like the step file. The utility file contains the API methods and the endpoints to perform the specific action like, POST, PUT, GET, or DELETE. The request body i.e. payload and the response body will be captured using the methods present in the utility file. So the reason these methods are created in the utility file is that we can use them multiple times and don’t have to create the same method over and over again.
package org.Spurqlabs.Utils;

import io.restassured.RestAssured;
import io.restassured.http.ContentType;
import io.restassured.response.Response;
import io.restassured.specification.RequestSpecification;

import java.io.File;
import java.util.Map;

public class APIUtility {
    public static Response sendRequest(String method, String url, Map<String, String> headers, Map<String, String> queryParams, Object body) {
        RequestSpecification request = RestAssured.given();
        if (headers != null && !headers.isEmpty()) {
            request.headers(headers);
        }
        if (queryParams != null && !queryParams.isEmpty()) {
            request.queryParams(queryParams);
        }
        if (body != null && !method.equalsIgnoreCase("GET")) {
            if (headers == null || !headers.containsKey("Content-Type")) {
                request.header("Content-Type", "application/json");
            }
            request.body(body);
        }
        switch (method.trim().toUpperCase()) {
            case "GET":
                return request.get(url);
            case "POST":
                return request.post(url);
            case "PUT":
                return request.put(url);
            case "PATCH":
                return request.patch(url);
            case "DELETE":
                return request.delete(url);
            default:
                throw new IllegalArgumentException("Unsupported HTTP method: " + method);
        }
    }
Step 6: Create a Token Generation using Playwright
In this step, we automate the process of generating authentication tokens using Playwright. Many APIs require login-based tokens (like cookies or bearer tokens), and managing them manually can be difficult — especially when they expire frequently.
The TokenManager class handles this by:
Logging into the application automatically using Playwright.
Extracting authentication cookies (OauthHMAC, OauthExpires, BearerToken).
Storing the token in a local JSON file for reuse.
Refreshing the token automatically when it expires.
This ensures that your API tests always use a valid token without manual updates, making the framework fully automated and CI/CD ready.
package org.Spurqlabs.Utils;

import java.io.*;
import java.nio.file.*;
import java.time.Instant;
import java.util.HashMap;
import java.util.Map;
import com.google.gson.Gson;
import com.google.gson.reflect.TypeToken;
import com.microsoft.playwright.*;
import com.microsoft.playwright.options.Cookie;

public class TokenManager {
    private static final ThreadLocal<String> tokenThreadLocal = new ThreadLocal<>();
    private static final ThreadLocal<Long> expiryThreadLocal = new ThreadLocal<>();
    private static final String TOKEN_FILE = "token.json";
    private static final long TOKEN_VALIDITY_SECONDS = 30 * 60; // 30 minutes

    public static String getToken() {
        String token = tokenThreadLocal.get();
        Long expiry = expiryThreadLocal.get();
        if (token == null || expiry == null || Instant.now().getEpochSecond() >= expiry) {
            // Try to read from a file (for multi-JVM/CI)
            Map<String, Object> fileToken = readTokenFromFile();
            if (fileToken != null) {
                token = (String) fileToken.get("token");
                expiry = ((Number) fileToken.get("expiry")).longValue();
            }
            // If still null or expired, fetch new
            if (token == null || expiry == null || Instant.now().getEpochSecond() >= expiry) {
                Map<String, Object> newToken = generateAuthTokenViaBrowser();
                token = (String) newToken.get("token");
                expiry = (Long) newToken.get("expiry");
                writeTokenToFile(token, expiry);
            }
            tokenThreadLocal.set(token);
            expiryThreadLocal.set(expiry);
        }
        return token;
    }

    private static Map<String, Object> generateAuthTokenViaBrowser() {
        String bearerToken;
        long expiry = Instant.now().getEpochSecond() + TOKEN_VALIDITY_SECONDS;
        int maxRetries = 2;
        int attempt = 0;
        Exception lastException = null;
        while (attempt < maxRetries) {
            try (Playwright playwright = Playwright.create()) {
                Browser browser = playwright.chromium().launch(new BrowserType.LaunchOptions().setHeadless(true));
                BrowserContext context = browser.newContext();
                Page page = context.newPage();

                // Robust wait for login page to load
                page.navigate(FrameworkConfigReader.getFrameworkConfig("BaseUrl"), new Page.NavigateOptions().setTimeout(60000));
                page.waitForSelector("#email", new Page.WaitForSelectorOptions().setTimeout(20000));
                page.waitForSelector("#password", new Page.WaitForSelectorOptions().setTimeout(20000));
                page.waitForSelector("button[type='submit']", new Page.WaitForSelectorOptions().setTimeout(20000));

                // Fill a login form
                page.fill("#email", FrameworkConfigReader.getFrameworkConfig("UserEmail"));
                page.fill("#password", FrameworkConfigReader.getFrameworkConfig("UserPassword"));
                page.waitForSelector("button[type='submit']:not([disabled])", new Page.WaitForSelectorOptions().setTimeout(10000));
                page.click("button[type='submit']");

                // Wait for either dashboard element or flexible URL match
                boolean loggedIn;
                try {
                    page.waitForSelector(".dashboard, .main-content, .navbar, .sidebar", new Page.WaitForSelectorOptions().setTimeout(20000));
                    loggedIn = true;
                } catch (Exception e) {
                    // fallback to URL check
                    try {
                        page.waitForURL(url -> url.startsWith(FrameworkConfigReader.getFrameworkConfig("BaseUrl")), new Page.WaitForURLOptions().setTimeout(30000));
                        loggedIn = true;
                    } catch (Exception ex) {
                        // Both checks failed
                        loggedIn = false;
                    }
                }
                if (!loggedIn) {
                    throw new RuntimeException("Login did not complete successfully: dashboard element or expected URL not found");
                }

                // Extract cookies
                String oauthHMAC = null;
                String oauthExpires = null;
                String token = null;
                for (Cookie cookie : context.cookies()) {
                    switch (cookie.name) {
                        case "OauthHMAC":
                            oauthHMAC = cookie.name + "=" + cookie.value;
                            break;
                        case "OauthExpires":
                            oauthExpires = cookie.name + "=" + cookie.value;
                            if (cookie.expires != null && cookie.expires > 0) {
                                expiry = cookie.expires.longValue();
                            }
                            break;
                        case "BearerToken":
                            token = cookie.name + "=" + cookie.value;
                            break;
                    }
                }
                if (oauthHMAC != null && oauthExpires != null && token != null) {
                    bearerToken = oauthHMAC + ";" + oauthExpires + ";" + token + ";";
                } else {
                    throw new RuntimeException("❗ One or more cookies are missing: OauthHMAC, OauthExpires, BearerToken");
                }
                browser.close();
                Map<String, Object> map = new HashMap<>();
                map.put("token", bearerToken);
                map.put("expiry", expiry);
                return map;
            } catch (Exception e) {
                lastException = e;
                System.err.println("[TokenManager] Login attempt " + (attempt + 1) + " failed: " + e.getMessage());
                attempt++;
                try { Thread.sleep(2000); } catch (InterruptedException ignored) {}
            }
        }
        throw new RuntimeException("Failed to generate auth token after " + maxRetries + " attempts", lastException);
    }

    private static void writeTokenToFile(String token, long expiry) {
        try {
            Map<String, Object> map = new HashMap<>();
            map.put("token", token);
            map.put("expiry", expiry);
            String json = new Gson().toJson(map);
            Files.write(Paths.get(TOKEN_FILE), json.getBytes());
        } catch (IOException e) {
            e.printStackTrace();
        }
    }

    private static Map<String, Object> readTokenFromFile() {
        try {
            Path path = Paths.get(TOKEN_FILE);
            if (!Files.exists(path)) return null;
            String json = new String(Files.readAllBytes(path));
            return new Gson().fromJson(json, new TypeToken<Map<String, Object>>() {}.getType());
        } catch (IOException e) {
            return null;
        }
    }
}
Step 7: Create Framework Config File
A good tester is one who knows the use and importance of config files. In this framework, we are also going to use the config file. Here, we are just going to put the base URL in this config file and will be using the same in the utility file over and over again. The config file contains more data than just of base URL when you start exploring the framework and start automating the new endpoints then at some point, you will realize that some data can be added to the config file.
Additionally, the purpose of the config files is to make tests more maintainable and reusable. Another benefit of a config file is that it makes the code more modular and easier to understand as all the configuration settings are stored in a separate file and it makes it easier to update the configuration settings for all the tests at once.
At this stage, we create the TestRunner class, which serves as the entry point to execute all Cucumber feature files. It uses TestNG as the test executor and integrates Cucumber for running BDD-style test scenarios.
The @CucumberOptions annotation defines:
features → Location of all .feature files.
glue → Packages containing step definitions and hooks.
plugin → Reporting options like JSON and HTML reports.
After execution, Cucumber automatically generates:
Cucumber.json → For CI/CD and detailed reporting.
Cucumber.html → A user-friendly HTML report showing test results.
This setup makes it easy to run all API tests and view clean, structured reports for quick analysis.
Once the framework is set up, you can execute your API automation suite directly from the command line using Maven. Maven handles compiling, running tests, and generating reports automatically.
Run All Tests –
To run all Cucumber feature files:
mvn clean test
clean → Deletes old compiled files and previous reports for a fresh run.
test → Executes all test scenarios defined in your project.
After running this command, Maven will trigger the Cucumber TestRunner, execute all scenarios, and generate reports in the test-output folder.
Run Tests by Tag –
Tags allow you to selectively run specific test scenarios or features. You can add tags like @api1, @smoke, or @regression in your .feature files to categorize tests.
Example:
@api1
Scenario: Verify POST API creates a record successfully
  Given User sends "POST" request to "/api/v1/create" ...
  Then User verifies the response status code is 201
To execute only scenarios with a specific tag, use:
mvn clean test -Dcucumber.filter.tags="@api1"
The framework will run only those tests that have the tag @api1.
You can combine tags for more flexibility:
@api1 or @api2 → Runs tests with either tag.
@smoke and not @wip → Runs smoke tests excluding work-in-progress scenarios.
This is especially useful when running specific test groups in CI/CD pipelines.
View Test Reports
API Automation Testing Framerwork Report – After the execution, Cucumber generates detailed reports automatically in the test-output directory:
Cucumber.html → User-friendly HTML report showing scenario results and logs.
Cucumber.json → JSON format report for CI/CD integrations or analytics tools.
You can open the report in your browser:
project-root/test-output/Cucumber.html
This section gives testers a clear understanding of how to:
API automation testing framework ensures that backend services are functioning properly before the application reaches the end user. Therefore, by integrating Cucumber, RestAssured, and Playwright, we have built a flexible and maintainable test framework that:
Supports BDD style scenarios.
Handles token-based authentication automatically.
Provides reusable utilities for API calls.
Generates rich HTML reports for easy analysis.
This hybrid setup helps QA engineers achieve faster feedback, maintain cleaner code, and enhance the overall quality of the software.
I am an Jr. SDET Engineer skilled in Manual and Automation Testing (UI & API). Proficient in Selenium, Cucumber, TestNG, Postman, RestAssured, Maven, SQL, GitHub, Jenkins, Java, JavaScript, HTML, and CSS. Experienced in CI/CD integration, framework design, and ensuring high-quality software delivery.
Tired of spending hours writing and maintaining complex test scripts? We get it. That’s why we’re excited to introduce the Cypress Cucumber Framework (Cypress BDD Automation) — a game changer for software testing. This combination makes testing more efficient, collaborative, and accessible.
Imagine a framework that speaks everyone’s language, from developers to product managers. With Cypress, Cucumber, and Behavior-Driven Development (BDD), you can therefore achieve tests that are robust, reliable, and easily understood. No more cryptic code or miscommunication!
In this post, we will first cover the fundamentals of Cypress and Cucumber BDD, then guide you through the setup process, and finally share best practices for automation. Get ready to boost productivity and streamline your testing!
By the end, readers will have gained a strong foundation in Cypress for UI automation, making them ready to implement effective automated testing in their projects.
In the current blog on the Cypress Cucumber Framework: A Complete Guide to BDD Automation for Efficient Testing, we will build upon this knowledge by integrating Cucumber for Behavior-Driven Development, enhancing test readability and collaboration among team members.
What is Behavior Driven Development (BDD)?
Behavior Driven Development (BDD) is an agile software development practice that enhances communication between stakeholders. It, in turn, encourages collaboration among developers, testers, and non-technical team members to define how an application should behave, all based on user requirements. The core philosophy is to define behavior in plain language, making it easily understandable for all parties involved.
What is Cucumber?
Cucumber is an open-source tool that supports BDD by allowing users to write tests in plain language. It, moreover, uses a domain-specific language (DSL) called Gherkin, which is designed to be human-readable. As a result, this means that even non-technical stakeholders can participate in the testing process, enhancing collaboration and ensuring that everyone is on the same page.
Key Features of Cucumber BDD
Readable Syntax: Cucumber uses Gherkin syntax, enabling test scenarios to be written in natural language. Each scenario follows the structure:
Given: Sets pre-conditions or context.
When: Specifies the user’s action.
Then: Defines the expected outcome.
Collaboration: Cucumber promotes teamwork by providing a common language, and reducing miscommunications between developers and stakeholders.
Automation Support: Integrates well with tools like Selenium, making it easier to automate tests based on defined behaviors.
CI/CD Integration: Cucumber can be seamlessly added to CI/CD pipelines, supporting automated testing and ensuring code quality throughout development.
Benefits of Using Cucumber BDD
Improved Communication: Encourages collaboration among all stakeholders, reducing misunderstandings.
Higher Test Coverage: Ensures that all user scenarios are considered by involving non-technical team members.
Living Documentation: Keeps documentation relevant and up to date with evolving application features.
Faster Feedback Loop: Automated tests provide quick feedback, accelerating development and iterations.
How to Get Started with Cucumber BDD
Set Up Your Environment
Define Features and Scenarios
Map Step Definitions
Write Script
Run Tests
Benefits of combining Cypress with Cucumber (Cypress Cucumber Framework)
While Cypress is powerful on its own, combining it with Cucumber takes our testing to a whole new level. Cucumber is a tool that supports Behavior-Driven Development (BDD), allowing us to write tests in a natural language that both technical and non-technical team members can understand.
Here are some key benefits of this combination:
Improved collaboration: By using Cucumber’s Gherkin syntax, we create a common language between developers, QA, and business stakeholders.
Enhanced test readability: Cucumber scenarios are written in plain English, making it easier for everyone to understand what’s being tested.
Reusable step definitions: We can create step definitions in Cypress that map to Cucumber scenarios, promoting code reuse and maintainability.
Living documentation: Our Cucumber features serve as both tests and documentation, ensuring our documentation stays up to date with the actual product behavior.
Scenario-driven development: We can focus on describing the desired behavior first, then implement the necessary code to make it work.
Here’s a comparison of traditional testing approaches versus BDD:
Aspect
Traditional Testing
Behavior-Driven Development (BDD)
Focus
Verifying functionality
Describing user behavior
Language
Technical jargon
Natural language
Collaboration
Limited to developers and testers
Extensive involvement of all stakeholders
Documentation
Separate from tests
Tests double as documentation
Test Creation
After development
Before or during development
User Involvement
Minimal
Continuous involvement
Feedback Cycle
Slower feedback
Rapid feedback loops
In the next phase of our exploration of the Cypress Cucumber Framework, we’ll learn the practicalities of setup and implementation. We’ll cover how to structure projects, write effective scenarios, and harness the strengths of both Cypress and Cucumber to build a comprehensive, maintainable test suite.
Cypress Cucumber Framework Folder Structure
When building a robust test automation framework with Cypress and Cucumber, the project structure plays a critical role in maintainability, scalability, and team collaboration. A well-organized project allows testers and developers to easily locate files, add new features, and scale the framework as the project grows. Here’s a suggested structure for setting up your Cypress Cucumber framework:
cypress/ – This is the main directory where all Cypress-related files are stored. It houses everything from test data to plugins and supporting scripts.
e2e/features/ – This is where our .feature files, written in Gherkin syntax are stored. Each .feature file describes test scenarios in a human-readable format, enabling BDD-style testing. For example: – Login.feature
e2e/step_definitions/ – This subfolder holds our JavaScript files where we define the actual step definitions corresponding to the steps in our .feature files. For example: – Login_steps.js
e2e/page_objects/ – This is a new folder for Page Object Model (POM) files. Page objects abstract the logic of interacting with different pages in our application. This separation keeps your tests clean, readable, and easier to maintain.
cypress.config.js – This configuration file allows us to manage and configure our Cypress environment. Here, we can set environment-specific configurations, manage base URLs, and define other test-related settings.
package.json – This is the standard Node.js configuration file. It lists the dependencies, scripts, and other essential settings needed for your Cypress Cucumber project. Here, we’ll define the testing dependencies like cypress, cypress-cucumber-preprocessor, and any other required libraries.
Based on the folder structure outlined above, let’s now proceed to create the structure in our project.
Setting Up the Automation Framework
Now we’ve covered the basics of Cypress and Cucumber BDD, let’s dive into setting up our automation framework. This crucial step will lay the foundation for our entire testing process, ensuring we have a robust and efficient system in place.
Install VS Code and create new project
Install & configure Cypress Automation Framework
To set up the Cypress Cucumber framework, the first step is to install Visual Studio Code (VS Code) and set up a basic Cypress JavaScript framework. I’ve outlined the detailed procedure for installing Cypress and creating the initial Cypress framework in my previous blog, “JavaScript and Cypress Framework for Modern UI Automation“. You can follow the steps from that guide to get your Cypress framework up and running. Once that’s done, we’ll move forward with installing and integrating Cucumber BDD in our project. We can also clone cypress framework from “JavaScript-Cypress-WebAutomation” repository.
By following the steps outlined in the “JavaScript and Cypress Framework for Modern UI Automation“ blog, we’ll now have a complete Cypress framework set up, including the package.json, cypress.config.js, and a cypress folder containing your tests, test data, and hooks. The next step is to upgrade this existing Cypress framework to a Cypress Cucumber framework for BDD integration.
@badeball/cypress-cucumber-preprocessoris a plugin that enables the use of Cucumber’s Behavior Driven Development (BDD) approach in Cypress testing. It allows you to write tests in Gherkin syntax (using feature files), making it easier to define scenarios in plain language that non-technical stakeholders can understand. This preprocessor translates Gherkin steps into Cypress commands, allowing smooth integration of BDD into your Cypress test suite.
@cypress/browserify-preprocessor is a plugin for Cypress that bundles JavaScript files using Browserify. It processes the files before Cypress executes them, allowing you to use CommonJS modules and other advanced JavaScript features in your test files. This preprocessor helps Cypress understand and run tests that include modern JavaScript or require module bundling, ensuring smooth execution of your test suite.
Configuring Installed Dependencies in cypress.config.js
When we install Cypress, the cypress.config.js file is automatically created at the root of our project. To configure Cypress with Cucumber, we need to add the following code to this file:
This configuration in the cypress.config.js file is required to enable the Cypress Cucumber Preprocessor and handle feature files written in Gherkin syntax.
These imports load the necessary preprocessor libraries to translate Gherkin syntax into Cypress test commands.
preprocessor.addCucumberPreprocessorPlugin: Adds Cucumber-specific functionalities, such as generating JSON reports after test runs.
on(“file:preprocessor”, browserify.default(config)): Uses Browserify to bundle the test files, ensuring the feature files and JavaScript modules are correctly processed before execution.
In summary, this configuration integrates the Cucumber framework with Cypress and ensures that feature files are preprocessed and executed correctly.
Hooks
Hooks are functions that allow you to run specific code before or after a scenario or feature in your Cucumber tests. These hooks help manage setup and teardown tasks, such as navigating to a webpage or resetting application state, before or after each test is executed.
Types of Hooks: Before: Runs before each scenario. After: Runs after each scenario. BeforeAll: Runs once before all scenarios in a feature. AfterAll: Runs once after all scenarios in a feature.
import { Before, After } from "@badeball/cypress-cucumber-preprocessor";
import selectors from "../../fixtures/Selectors.json";
Before(() => {
  cy.visit("https://www.calculator.net");
});
After(() => {
  cy.get(selectors.cancelButton).click();
});
Before Hook – This code runs before each scenario in the feature file. It navigates to the https://www.calculator.net website using the cy.visit() command. This ensures that every test starts from the calculator page.
After Hook – This code runs after each scenario. It clicks on the cancel button (specified in the Selectors.json file) to potentially reset any changes made during the test, ensuring a clean state for subsequent tests.
These hooks help ensure consistency and better test management by handling common setup and cleanup tasks efficiently.
Automating Scenario
Creating .Feature File
Before we begin creating the .feature file, let’s outline the functionalities we’ll be automating. We’ll be working with the Calculator.net web application, focusing on automating basic arithmetic operations: addition, subtraction, multiplication, and division.
Test Scenarios:
Verify user can perform addition
Verify user can perform subtraction
Verify user can perform multiplication
Verify user can perform division
Now we will follow below steps and create feature file
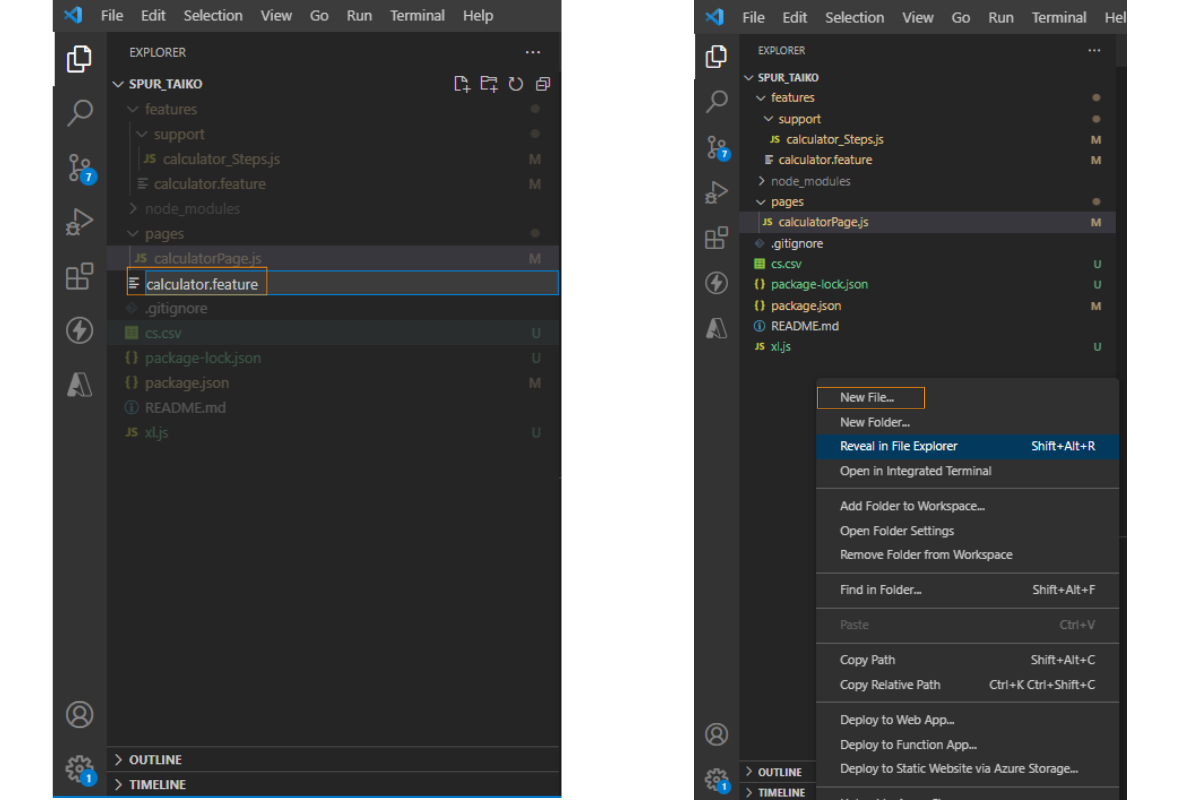
Launch Visual Studio Code and open your project folder.
Navigate to cypress/e2e create feature directory.
Right-click on the feature folder and select New File. – Name the file with the .feature extension, e.g., calculator.feature.
Write below code in calculator.feature with the Gherkin Syntax:
Feature: Calculator Operations

    @regression
    Scenario: Verify user is able to do addition
        When User clicks on number "2"
        And User clicks on operator "+"
        And User clicks on number "1"
        And User clicks on "="

    @regression
    Scenario: Verify user is able to do subtraction
        When User clicks on number "3"
        And User clicks on operator "-"
        And User clicks on number "1"
        And User clicks on "="
        Then The result should be "2"
What is a Feature File?
A feature file is a document written in plain language that outlines the behavior of a software feature or a set of related features. It is primarily used in Behavior Driven Development (BDD) frameworks like Cucumber to describe application behavior in a way that both technical and non-technical stakeholders can understand.
The structure of a feature file includes:
Feature
Scenario
Given-When-Then format
Feature files use the Gherkin language to describe these behaviors.
What is Gherkin?
Gherkin is a structured language used to write feature files in BDD. It uses simple syntax and plain English, making it easy for anyone, including non-developers, to understand the application’s expected behavior. Gherkin uses a specific set of keywords to define the structure of a feature file, including:
Feature: A high-level description of the functionality being tested.
Scenario: Individual test cases written to validate specific aspects of the feature.
Given: Describes the initial context or prerequisites (e.g., navigating to a webpage).
When: Specifies the action taken by the user or system (e.g., clicking a button).
Then: Describes the expected outcome (e.g., the result should be displayed).
And / But: Used to add additional steps to the scenario.
Gherkin’s key advantage is its readability and collaboration, as it helps bridge the communication gap between technical teams and non-technical stakeholders by providing a shared language for defining requirements.
Creating Step Definition file
In a Cypress project using @badeball/cypress-cucumber-preprocessor, feature file steps written in plain English are mapped to corresponding code in the step definition file. This mapping is crucial because it connects the behavioral steps defined in the feature file to the automation code that performs the actual actions and validations.
Now we will create step file and map with feature file
Open project in VS code.
Navigate to cypress/e2e. Right click on e2e and select New Folder and give name as “step_definition“.
Right-click on the step_definition folder and select New File. – Name the file with the .js extension, e.g. CalculatorStep.js.
import { When, Then } from "@badeball/cypress-cucumber-preprocessor";
import { CalculatorPage } from "../page/CalculatorPage.js";
const calculatorPage = new CalculatorPage();
When("User clicks on number {string}", (number) => {
  calculatorPage.clickNumber(number);
});
When("User clicks on operator {string}", (operator) => {
  calculatorPage.clickOperator(operator);
});
When('User clicks on "="', () => {
  calculatorPage.clickEquals();
});
Then("The result should be {string}", (expectedResult) => {
  calculatorPage.verifyResult(expectedResult);
});
Let’s now break down how this mapping works using the provided example:
The step_definition file contains JavaScript functions that implement the logic for each feature file step. These functions are mapped to the feature file steps based on matching text patterns.
Mapping Example:
Feature Step: When User clicks on number “2”
Step Definition:
When("User clicks on number {string}", (number) => {
  calculatorPage.clickNumber(number);
});
The text “User clicks on number {string}” matches the feature step text, where {string} is a placeholder for the number (“2” in this case).
The value “2” is passed as the number parameter to the function calculatorPage.clickNumber(number).
Feature Step: Then The result should be “3”
Step Definition:
Then("The result should be {string}", (expectedResult) => {
  calculatorPage.verifyResult(expectedResult);
});
The text “The result should be {string}” matches the step, and “3” is passed as the expectedResult parameter to verifyResult.
Dynamic Parameter Handling
The placeholders in the step definition {string} allow dynamic values from the feature file to be passed as parameters. This approach ensures that the same step definition can handle multiple scenarios with different inputs, making your tests more reusable.
Behind the Scenes: Automatic Mapping
The @badeball/cypress-cucumber-preprocessor automatically matches feature file steps to step definitions based on the matching text. As long as:
The text pattern in the step definition matches the feature file step.
The corresponding file is in the correct folder structure (e.g., step_definition).
We don’t need to do any additional configuration.
Why This Mapping is Useful
Readability: The feature file is easy to understand for non-technical stakeholders.
Reusability: A single step definition can be reused across multiple scenarios with different inputs.
Separation of Concerns: Keeps business logic (feature file) separate from automation code (step definitions).
Creating Page file
What is a Page Object Model (POM) File?
The Page Object Model (POM) is a design pattern in test automation that promotes the separation of test logic from the UI elements. It creates an object repository for web UI elements, making tests more maintainable, readable, and reusable. Each page of the application is represented by a corresponding class, which contains methods to interact with the elements on that page.
Benefits of Using POM:
Maintainability: Changes in UI require updates in only one place (the POM).
Readability: Tests are cleaner and more understandable.
Reusability: Common methods can be reused across different test cases.
Now let’s create Page Object Model (POM) file,
Open project in VS code.
Navigate to cypress/e2e Right click on e2e and select New Folder and give name as “page“.
Right-click on the page folder and select New File. – Name the file with the .js extension, e.g., CalculatorPage.js.
import selectors from "../../fixtures/Selectors.json";
export class CalculatorPage {
  clickNumber(number) {
    switch (number) {
      case "0":
        cy.get(selectors.zeroNumberButton).click();
        break;
      case "1":
        cy.get(selectors.oneNumberButton).click();
        break;
      case "2":
        cy.get(selectors.twoNumberButton).click();
        break;
      case "3":
        cy.get(selectors.threeNumberButton).click();
        break;
      case "4":
        cy.get(selectors.fourNumberButton).click();
        break;
      case "5":
        cy.get(selectors.fiveNumberButton).click();
        break;
      case "6":
        cy.get(selectors.sixNumberButton).click();
        break;
      case "7":
        cy.get(selectors.sevenNumberButton).click();
        break;
      case "8":
        cy.get(selectors.eightNumberButton).click();
        break;
      case "9":
        cy.get(selectors.nineNumberButton).click();
        break;
    }
  }
  clickOperator(operator) {
    switch (operator) {
      case "+":
        cy.get(selectors.plusOperatorButton).click();
        break;
      case "-":
        cy.get(selectors.minusOperatorButton).click();
        break;
      case "*":
        cy.get(selectors.multiplyOperatorButton).click();
        break;
      case "/":
        cy.get(selectors.divideOperatorButton).click();
        break;
    }
  }
  clickEquals() {
    cy.get(selectors.equalsOperatorButton).click();
  }
  verifyResult(expectedResult) {
    cy.get(selectors.result).should("contain.text", expectedResult);
  }
}
The CalculatorPage class uses the Page Object Model (POM) to manage interactions with a calculator’s UI.
Selectors Import:
Fetches locators from Selectors.json for buttons and result display.
Methods:
clickNumber(number): Clicks a number button (e.g., “2” clicks selectors.twoNumberButton).
clickOperator(operator): Clicks an operator button (+, -, *, /).
clickEquals(): Clicks the “=” button.
verifyResult(expectedResult): Validates the displayed result matches with the expected value.
Configuring Feature and Step Definition Paths
To seamlessly integrate feature files and step definitions in our Cypress project using the Cucumber preprocessor, we need to configure their paths. Here’s how we can set them up effectively:
Defining the Feature File Path and additional configuration
Start by defining where your feature files are located:
Open cypress.config.js.
Under the e2e section in module.exports, specify the path to your feature files and additional configuration.
package.json defines the setup for a Cypress framework with Cucumber integration for Behavior-Driven Development (BDD). Let’s breakdown:
Metadata:
name: “cypresscucumberframework” – The name of the project.
version: Version of the framework.
description: Describes the purpose of the project as a Cypress BDD framework using Cucumber.
author: The author of the project.
license: The license type.
keywords: A list of relevant keywords to describe the project.
Dependencies:
@badeball/cypress-cucumber-preprocessor: Used for integrating Cucumber feature files with Cypress.
cypress: Core Cypress testing library.
Dev Dependencies:
@cypress/browserify-preprocessor: Required to handle JavaScript files with Cucumber preprocessor.
Cypress Cucumber Preprocessor Configuration:
stepDefinitions: Specifies the path for step definition files (cypress/e2e/step-definition/*.js).
filterSpecs: Ensures only filtered specs (by tags) are run.
omitFiltered: Omits filtered tests from output results.
This ensures the Cucumber preprocessor can locate and execute the step definitions during testing.
Execute Test Cases in Cypress
Running Cypress Tests via Cypress Runner
Open VS Code terminal and type:
npx cypress open
The Cypress Runner will launch.
Select E2E Testing, then choose your desired browser.
A dashboard will appear with all feature files listed. Select a feature file to start execution.
Pro Tip: To run all test suites in one go instead of selecting them individually:
Edit package.json file under the “scripts” section as shown:
“scripts”: { “script”: “cypress run –browser chrome”, “test”: “npm run script” }
Now, execute the tests with:
npm run test
This command runs all tests in headless mode using Chrome. You can switch browsers if needed and even add pre-test or post-test configurations, like cleaning reports or screenshots.
Running Cypress Cucumber Tests with Tags
We can filter tests by tagging scenarios, such as @smoke, @sanity, or @regression. Here’s how:
Run specific tests by tag
npx cypress run –env tags=”@regression”
Ensure these settings are added under “cypress-cucumber-preprocessor” in package.json:
“filterSpecs”: true, “omitFiltered”: true
Run tests with either of two tags
npx cypress run –env tags=”@Smoke or @regression”
Run tests with both tags
npx cypress run –env tags=”@Smoke and @regression”
Test Execution Results
After execution, you’ll see a summary with details like total tests, passed, failed, and skipped. This makes it easy to analyze the run and debug issues efficiently.
By leveraging tags and custom scripts, Cypress lets us streamline test execution and manage complex scenarios with ease!
Conclusion
The Cypress Cucumber Framework is a powerful combination that brings together the efficiency of Cypress and the collaboration-driven approach of Cucumber’s Behavior-Driven Development (BDD). By leveraging this framework, teams can write tests in plain language, improving communication and collaboration between technical and non-technical stakeholders.
This approach ensures enhanced test readability, maintainability, and scalability through features like reusable step definitions, documentation, and integration with CI/CD pipelines. Additionally, its ability to manage complex scenarios using tags and a well-organized project structure makes it an excellent choice for modern automated testing. Adopting this framework enables faster feedback loops, higher test coverage, and user-focused application development.
I am an SDET Engineer proficient in manual, automation, API, Performance, and Security Testing. My expertise extends to technologies such as Selenium, Cypress, Cucumber, JMeter, OWASP ZAP, Postman, Maven, SQL, GitHub, Java, JavaScript, HTML, and CSS. Additionally, I possess hands-on experience in CI/CD, utilizing GitHub for continuous integration and delivery. My passion for technology drives me to constantly explore and adapt to new advancements in the field.
Behavior Driven Development (BDD) is a process that promotes collaboration between developers, testers, and stakeholders by writing test cases in simple, plain language. BDD Automation Frameworks like Cucumber use Gherkin to make test scenarios easily understandable and link them to automated tests.
In this guide, we’ll show you how to create a BDD Automation Framework using Java and Playwright. Playwright is a powerful browser automation tool, and when combined with Java and Cucumber, it creates a solid BDD testing framework.
Introduction to BDD Automation Framework:
Automation testing is testing software with the latest tools and technologies with developed scripts in less time. In Automation testing it involves test case execution, data validation, and result reporting.
Why Playwright over Selenium?
Playwright is an open-source Node.js library that further enables efficient end-to-end (E2E) testing of web applications. As Playwright offers better performance speed than Selenium. Also, Playwright offers various features like Cross-Brower support, Multi-platform, Headless and Headful Mode, Async/Await API, Integration with Testing Frameworks.
What is BDD Automation Framework?
BDD framework is an agile approach to test software where testers write test cases in simple language so that non-tech person can also understand the flow. Moreover, it enhances collaboration between the technical team and the business team. We use Gherkin language to write feature files, making them easily readable by everyone.
Prerequisites for BDD Automation Framework:
1. Install JDK
Install the Java environment as per the system compatible.
First, choose the appropriate JDK version, and then click on the download link for the Windows version.
Run the Installer:
Once the download is complete, run the installer.
To begin, follow the installation instructions, then accept the license agreement, and finally choose the installation directory.
Set Environment Variables:
Open the Control Panel and go to System and Security > System > Advanced system settings.
Click on “Environment Variables”.
Under “System Variables,” click on “New” and add a variable named JAVA_HOME with the path to the JDK installation directory (e.g., C:\Program Files\Java\jdk-15).
Find the “Path” variable in the “System Variables” section, click on “Edit,” and add a new entry with the path to the bin directory inside the JDK installation directory (e.g., C:\Program Files\Java\jdk-15\bin).
Verify Installation:
Open a Command Prompt and check if Java is installed correctly by typing `java -version` and `javac -version`.
Click on the link to download the binary zip archive (e.g., apache-maven-3.x.y-bin.zip).
Extract the Archive:
Extract the downloaded zip file to a suitable directory (e.g., C:\Program Files\Apache\maven).
Set Environment Variables:
Open the Control Panel and go to System and Security > System > Advanced system settings.
Click on “Environment Variables”.
Under “System Variables”, click on “New” and add a variable named MAVEN_HOME with the path to the Maven installation directory (e.g., C:\Program Files\Apache\maven\apache-maven-3.x.y).
Find the “Path” variable in the “System Variables” section, click on “Edit”, and add a new entry with the path to the bin directory inside the Maven installation directory (e.g., C:\Program Files\Apache\maven\apache-maven-3.x.y\bin).
Verify Installation:
To check if Maven is installed correctly, open a Command Prompt and type `mvn -version`.
Java Development Kit (JDK): Ensure you have JDK installed and properly configured.
Maven or Gradle: Depending on your preference, however, you’ll need Maven or Gradle to manage your project dependencies.
Steps to Install Cucumber with Maven
Create a Maven Project:
Update pom.xml File:
Open the pom.xml file in your project.
This Maven POM file (pom.xml) defines project metadata, dependencies on external libraries (Cucumber, Selenium, Playwright), and Maven build properties. It provides the necessary configuration for managing dependencies, compiling Java source code, and integrating with Cucumber, TestNG, Selenium, and Playwright frameworks to support automated testing and development of the CalculatorBDD project.
Before starting the project on the BDD Automation Framework:
Create a new Maven project in your IDE.
Add the dependencies in Pom.xml file .
Create folder structure following steps given below:
When we created the new project for the executable jar file, we could see the simple folder structure provided by Maven.
SRC Folder: The SRC folder is the parent folder of a project, and it will also include the main and test foldersIn the QA environment, we generally use the test folder, while we reserve the main folder for the development environment. The development team uses the main folder, so the created JAR contains all the files inside the src folder.
Test Folder: Inside the test folder; additionally, Java and resources folders are available.
Java Folder: This folder primarily contains the Java classes where the actual code is present.
Resources Folder: The Resources folder contains the resources file, test data file, and document files.
Pom.xml: In this file, we are managing the dependencies and plugins that are required for automation.
As our project structure is ready so we can start with the BDD framework:
1. Feature file:
Here we have described the scenario in “Gherkin” language which is designed to be easily understandable by non-technical stakeholders as well as executable by automation tools like Cucumber. Each scenario is written in structured manner using keywords “Given”, “When” and “Then”. Calculator.feature in this we have specifically written our functional testing steps.
@Basic
Feature: Verify Calculator Operations

  Scenario Outline: Verify addition of two numbers
    #Given line states that the User is on the Calculator home page and Calculator page is displayed.
    Given I am on Calculator page
    #When step describes an action that User enters/clicks on a number
    When I enter number <number>
    #And step indicates clicking on a specific operator (like addition, subtraction, etc.) on the calculator
    And I click on operator '<operator>'
    #And Step follows the operator click by entering another number into the calculator.
    And I enter number <number1>
    #Then is the verification step where the test checks if the result displayed
    Then I verify the result as <expectedResult>
    Examples:
      | number | operator | number1 | expectedResult |
      | 5      | +        | 2       | 7              |
      | 9      | -        | 3       | 6              |
      | 6      | *        | 4       | 24             |
      | 2      | /        | 2       | 1              |
2. Step Def File:
The step definition file serves as the bridge between actual feature file with the actual method implementation in the page file. The Calculator steps are a step definition file that maps the feature file to the page file and functional implementation.
package steps;

import core.TestContext;
import io.cucumber.java.en.And;
import io.cucumber.java.en.Given;
import io.cucumber.java.en.Then;
import io.cucumber.java.en.When;
import org.testng.Assert;
import pages.CalculatorPage;

import java.io.IOException;

public class CalculatorSteps extends TestContext {

    public CalculatorSteps() {
        //Here the  constructor initializes a new instance of CalculatorPage,
        // so the CalculatorSteps class can interact with the calculator web page through methods in the CalculatorPage class
        calculatorPage = new CalculatorPage();
    }

    @Given("I am on Calculator page")
    //Here we call the function from Calculator Page which is Sync with Feature file Given definition
    public void iAmOnCalculatorPage() throws IOException {
        calculatorPage.iAmOnCalculatorPage();
    }

    @When("I enter number {int}")
    //Here also the function is called from page file and Sync with feature file When step
    public void iEnterNumber(int number) {
        calculatorPage.iEnterNumber(number);
    }

    @And("I click on operator {string}")
    //Here also the function is called from page file and sync with feature file And step
    public void iClickOnOperator(String operator) {
        calculatorPage.iClickOnOperator(operator);
    }

    @Then("I verify the result as {int}")
    //Here also the function is called from page file and synched with feature file Then step
    public void iVerifyTheResultAs(int expectedResult) {
        String actualResult = calculatorPage.iVerifyTheResultAs();
        Assert.assertEquals(actualResult, String.valueOf(expectedResult));
    }
}
3. Page File:
Page file, in addition, is actual code implementation from the step definition file.Here, we have saved all the actual methods and web page elements, thereby ensuring easy access and organization. It is basically POM structure. So here we are performing addition operation in Calculator we application so created a method to click on a number and another method for clicking on the operator. Here we can minimize the code by reusing the code as much as possible.
package pages;

import core.TestContext;
import utilities.ConfigUtil;

import java.io.IOException;

public class CalculatorPage extends TestContext {
    public void iAmOnCalculatorPage() throws IOException {
        page.navigate(ConfigUtil.getPropertyValue("base_url"));
    }

    public void iEnterNumber(int number) {
        page.locator("//span[@onclick='r(" + number + ")']").click();

    }

    public void iClickOnOperator(String operator) {
        page.locator("//span[@onclick=\"r('" + operator + "')\"]").click();
    }

    public String iVerifyTheResultAs() {
        page.locator("//span[@onclick=\"r('=')\"]").click();
        return page.locator("//div[@id='sciOutPut']").innerText().trim();
    }

    public void tearDown() {
        page.close();
    }
}
4. Hooks:
Hooks are setup and teardown methods that, therefore, are written separately in the configuration class. Here we have annotation declare in the hooks file @before and @After. Hooks are steps to be performed a before and after function of the feature file. In this we have open the Web browser in Before and After Tag. These are special functions which allows the testers to execute specific points during execution.
package core;

import core.TestContext;
import io.cucumber.java.After;
import io.cucumber.java.Before;
import io.cucumber.java.Scenario;
import utilities.WebUtil;

public class Hooks extends TestContext {//Hooks class inherits the property of TestContext class


    @Before  //@Before Tag denotes that it should be executed before scenario
    public void beforeScenario(Scenario scenario) {
        page = WebUtil.initBrowser();  //this method initializes the browser session
    }

    @After  //@After Tag denotes that it should be executed after scenario
    public void afterScenario() {
        WebUtil.tearDownPW();//this method is for tasks such as closing browser sessions
    }
}
5. TestContext:
The TestContext class, moreover, holds various instances and variables required for test execution. In this context, we have successfully created a web driver instance, a page file instance, and a browser context. As a result, the code reusability, organization, and maintainability are improved here.
package core;

import com.microsoft.playwright.Browser;
import com.microsoft.playwright.Page;
import pages.CalculatorPage;


public class TestContext {  //TestContext class, which acts as a container to store all instances for test framework

    public static Page page;
    //Refers to Playwright’s Page object. This controls a specific browser tab or page in a Playwright-based test

    public static CalculatorPage calculatorPage;
    //This stores an instance of the CalculatorPage object, representing the page object model (POM)

    public static Browser browser;
    //refers to Playwright's Browser instance, which represents the entire browser

}
6. TestRunner:
The Test Runner is responsible for discovering test cases, executing them, and reporting the results back; additionally, it provides the necessary infrastructure to execute the tests and manage the testing workflow. It also syncs the feature file with step file.
package core;

import io.cucumber.testng.AbstractTestNGCucumberTests;
import io.cucumber.testng.CucumberOptions;
import org.testng.annotations.DataProvider;

@CucumberOptions(features = "src/test/java/features", //the path where Cucumber feature files are located.
        glue = {"steps", "core"}) //Cucumber where to find the step definitions (in the steps and core packages)

public class TestRunner extends AbstractTestNGCucumberTests {
    //Above Etends which is a base class provided by Cucumber to run the tests with TestNG

    @DataProvider //allows running multiple Cucumber scenarios as separate tests in TestNG
    @Override
    public Object[][] scenarios() {
        return super.scenarios();
    }//Calls the parent class method to return all the Cucumber scenarios in an array format for TestNG to run
}
7. WebUtils:
Web Utils is a file in which browser instance is created and playwright is initialised here. The code for web browser page launching is written here and for closing the browser instance. The page is extended by TestContext where all the properties of TestContext are given to WebUtils page.
package utilities;

import com.microsoft.playwright.BrowserType;
import com.microsoft.playwright.Page;
import com.microsoft.playwright.Playwright;
import core.TestContext;

public class WebUtil extends TestContext {

    public static Page initBrowser(){
      //Initializes a browser session using Playwright's Chromium browser
        Playwright playwright = Playwright.create();  //Creates an instance of Playwright
        browser = playwright.chromium().launch(new BrowserType.LaunchOptions().setHeadless(false));
        page = browser.newPage(); //Creates a new page/tab within the launched browser
        return page;
    }

    public static void tearDownPW() {
        page.close();
    }   // It is called to close the current page/tag

}
This is the important file where we download all the dependencies required for the test execution. Also, it contains information of project and configuration information for the maven to build the project such as dependencies, build directory, source directory, test source directory, plugin, goals etc.
In this blog, we’ve discussed using the Java Playwright framework with Cucumber for BDD. Playwright offers fast, cross-browser testing and easy parallel execution, making it a great alternative to Selenium. Paired with Cucumber, it helps teams write clear, automated tests. Playwright’s debugging tools and test isolation also reduce test issues and maintenance, making it ideal for building reliable test suites for faster, higher-quality software delivery.
Hello! In this blog, I will be exploring how to automate tests using Taiko with Cucumber in JavaScript. The Taiko tool is easy to automate and is very reliable, and it works faster to execute and run test cases. It is a user-friendly tool as well.
What is Takio?
A Taiko is an automation tool that is available for free and it is an open-source browser automation tool. It is built by the ThoughtWorks team. It uses the Node.js library to automate the chrome browser. Taiko is very useful to create maintainable and highly readable JavaScript tests.
Taiko Features:
The Taiko was explicitly built to test modern web applications.
The features of Taiko that set it apart from other browser automation solutions are listed below.
Easy Installation
Interactive Recorder
Smart Selectors
Handle XHR and dynamic content
Request/Response stubbing and mocking
We can use Taiko on three platforms:
Windows
macOS
Linux
How to install Taiko?
A Taiko is available on npm: You can use the following NPM command to install the taiko on your system.
npm install -g taiko
What is cucumber?
A Cucumber is a testing tool that allows BDD. It offers a way to write tests that everyone, regardless of technical ability, can follow. Before developers build their code in BDD, users (business analysts, product owners) first write scenarios or acceptance tests that describe the system behavior from the perspective of the customer. Such scenarios and acceptance tests then are reviewed and approved by the product owners.
How to install Cucumber?
Basically, cucumber is available on npm: You can use the following NPM command to install the cucumber on your system.
npm install --save-dev @cucumber/cucumber
Getting Started
We will be using Visual Studio code to write our test automation code in JavaScript. We will create a feature file first, then click on the left side of the panel and choose “new file” from the menu that appears. Give a file name after that, such as the Calculator. feature
I’ll start out by introducing the Taiko framework, which integrates BDD and Cucumber. You will be guided through the code in the next step.
Feature: Calculator operations
  @smoke
  Scenario: Addition of 2 numbers
    Given I launch calculator application
    When I click on number 2
    And I click on operator +
    And I click on number 2
    Then I verify the result is 4
I’ll describe how to automate the calculator page in this place. The code shown below builds calculator steps where we must import statements provided by cucumber before navigating to the support folder.
After that, we can import the cucumber and assertion statements and that will build a page where all the steps are generally placed.
Basically, this is the step definition file where we need to map the feature file steps and call methods declared in the page file.
After that, we have to import the page file in the step definition file. And we need to call the methods declared in the page file.
Following is the code snippet for the step definition file.
const { Given, When, Then } = require('@cucumber/cucumber')
const calculate = require('../../pages/calculatorPage')
Given('I launch calculator application', async function () {
  await new calculate().launch()
})
When('I click on number {string}', async function (num) {
  await new calculate().click_number(num)
})
When('I click on operator {string}', async function (num) {
  await new calculate().click_operator(num)
})
Then('I verify the result is {string}', async function (num) {
  await new calculate().verify_result(num)
})
Now let’s create a page(We are using Page Object Model (POM) structure here) file where we have to declare the class and all the methods cleaning in step definitions.
And, In the above code snippet, methods contain actions like opening the browser, visiting a website, CSS selectors and actions to be performed on it (click), and Assertions. You may notice that we are doing open browser and close browser actions into this page file itself which is not the best practice. You can move it to Before/After hooks and create a nice framework. However, that is for a later blog 🙂
So, to execute the test case, you can run the following command from the terminal.
npx cucumber-js --publish
Happy testing !!!
Conclusion:
We can automate tests using taiko with Cucumber with JavaScript very easily. Taiko is a very powerful tool and easy to implement. It will definitely compete with Selenium and Playwright in the coming years.
By profession an Automation Test Engineer, Having 3+year experience in Manual and automation testing. Having hands-on experience in Cypress with JavaScript, NodeJS. Designed automation web framework in Cypress, Webdriver.io, Selenium with jest in JavaScript. He loves to explore and learn new tools and technologies.
Any test automation report, without screenshots, would look dull and will not provide enough information on where the test failed. If you add only screenshots, it will make the report information-rich. Now, if your tool has the capability to record the video as well, then it will be cherry on the top. A playwright is an automation tool that has these features integrated in-built. Here we will cover various types of screenshots that can be attached and how to record the video. This blog will help you to learn the steps to include Capture screenshots and videos in java playwright.
Playwright contains the following inbuilt functionalities:
Here, we are exploring the functionality to capture the snapshots and how to attach them to the Cucumber report. You must have the Cucumber report set up in your framework in order to accomplish this.
Let’s, Understand first how to Capture screenshots and videos in java playwright.
1. Page Screenshot:
As you are all aware, we usually use this screenshot to attach what is visible on the screen for verification purposes.
public static List takeScreenShots() throws IOException
    {
	public static byte[] array;
        long millisStart = Calendar.getInstance().getTimeInMillis();
        array = page.screenshot(new Page.ScreenshotOptions().setFullPage(false).setPath(Paths.get("test-output/ScreenShots/" + millisStart + ".png")));
        List output = new ArrayList();
        output.add(array);
        output.add(millisStart + ".png");
        return output;
    }
2. Full Page Screenshot:
If your test requires you to attach a screenshot of the entire page, top to bottom. So this method will guide you easily. The code below helps to take a snapshot of the entire page, no matter how long it is, because setFullPage is set to ‘true’.
public static List takeScreenShots() throws IOException
    {
	public static byte[] array;
        long millisStart = Calendar.getInstance().getTimeInMillis();
        array = page.screenshot(new Page.ScreenshotOptions().setFullPage(true).setPath(Paths.get("test-output/ScreenShots/" + millisStart + ".png")));
        List output = new ArrayList();
        output.add(array);
        output.add(millisStart + ".png");
        return output;
    }
However, now you can see that the full scrollable page has been captured in this step.
3. Element Screenshot:
So here, now you can also capture a screenshot of a specific element with the help of a playwright. In the below code, you can see that a locator path is sent as a parameter to the .screenshot() method.
page.locator("locator of that element").screenshot(new Locator.ScreenshotOptions().setPath(Paths.get("test-output/ScreenShots/screenshot.png")));
Here, we can see that the screenshot has captured only the element given in the locator.
4. Attaching Screenshot to Cucumber Report:
Now, we are going to discuss how to attach these screenshots to the cucumber report.
The first step is to set up your framework for the cucumber report, and this blog does a great job of explaining how to do that. This will allow you to add a screenshot to the Cucumber report using the code below. In general, this code is placed in your after hooks (AfterScenario, AfterStep, After). In the code below, I recently added a current millisecond time as the file name. However, you can customize the file names to your choice.
public void screenshots(Scenario scenario) throws IOException
    {
        WebUtil.takeScreenShots();
        long millisStart = Calendar.getInstance().getTimeInMillis();
        scenario.attach(array, "image/png",millisStart+".png" );
    }
Therefore, you can now view the Cucumber report with the screen attach to the report. while you click on the expand icon, You may see the screenshot as well.
5. Video Recording:
Now, here the playwright has the ability to record the video which will make it easier for the tester to understand their execution results. Then we’ll see how you fit that video into your report.
First, you must declare the context properties on your browser as shown in the below code. Or, you can simply update your context option where you can begin your context on the browser. Typically this method is called inside Before hooks.
Now the above code will help you to record the video and it’s going to execute the test. After that, it will automatically be stored on the path which is shown in the code. Moreover, you must see that the context of your browser is closed after it will be stored.
The below lines of code demonstrate how to convert a recorded video into bytes. These bytes can then be used to attach the recorded video to a report or perform other operations.
public static byte[] encodeVideo(Path path) throws IOException {
    FileInputStream fis = new FileInputStream(String.valueOf(path));
    ByteArrayOutputStream bos = new ByteArrayOutputStream();
    byte[] b = new byte[1024];

    for (int readNum; (readNum = fis.read(b)) != -1; ) {
        bos.write(b, 0, readNum);
    }

    byte[] bytes = bos.toByteArray();
    return bytes;
}
After recording it from your project structure, you must use the following code to attach the video to the cucumber report. The tearDown method’s execution video attaching code is described below. This code will be easier to perform once the tearDown method has been completed and your video has been recorded and attached to the report. Normally, this teardown method is written using After hooks.
Now, the screenshots and videos will appear in the cucumber report as shown in the picture below. This video will be available as part of the report.
Conclusion:
Here, we see that the playwright automation tool allows us to take several screenshots as needed. How to record Capture screenshots and videos in java playwright which can help you to identify failures’ underlying causes without having to look at the report itself.
Swapnil is an SDET with 1+ years of hands-on experience in Manual, Automation, and API testing. The technologies I have worked on include Selenium, Playwright, Cucumber, Appium, Postman, SQL, GitHub, Java, and Python. Also, I love Blog writing and learning new technologies.