Any test automation report, without screenshots, would look dull and will not provide enough information on where the test failed. If you add only screenshots, it will make the report information-rich. Now, if your tool has the capability to record the video as well, then it will be cherry on the top. A playwright is an automation tool that has these features integrated in-built. Here we will cover various types of screenshots that can be attached and how to record the video. This blog will help you to learn the steps to include Capture screenshots and videos in java playwright.
Playwright contains the following inbuilt functionalities:
Here, we are exploring the functionality to capture the snapshots and how to attach them to the Cucumber report. You must have the Cucumber report set up in your framework in order to accomplish this.
Let’s, Understand first how to Capture screenshots and videos in java playwright.
1. Page Screenshot:
As you are all aware, we usually use this screenshot to attach what is visible on the screen for verification purposes.
public static List takeScreenShots() throws IOException
    {
	public static byte[] array;
        long millisStart = Calendar.getInstance().getTimeInMillis();
        array = page.screenshot(new Page.ScreenshotOptions().setFullPage(false).setPath(Paths.get("test-output/ScreenShots/" + millisStart + ".png")));
        List output = new ArrayList();
        output.add(array);
        output.add(millisStart + ".png");
        return output;
    }
2. Full Page Screenshot:
If your test requires you to attach a screenshot of the entire page, top to bottom. So this method will guide you easily. The code below helps to take a snapshot of the entire page, no matter how long it is, because setFullPage is set to ‘true’.
public static List takeScreenShots() throws IOException
    {
	public static byte[] array;
        long millisStart = Calendar.getInstance().getTimeInMillis();
        array = page.screenshot(new Page.ScreenshotOptions().setFullPage(true).setPath(Paths.get("test-output/ScreenShots/" + millisStart + ".png")));
        List output = new ArrayList();
        output.add(array);
        output.add(millisStart + ".png");
        return output;
    }
However, now you can see that the full scrollable page has been captured in this step.
3. Element Screenshot:
So here, now you can also capture a screenshot of a specific element with the help of a playwright. In the below code, you can see that a locator path is sent as a parameter to the .screenshot() method.
page.locator("locator of that element").screenshot(new Locator.ScreenshotOptions().setPath(Paths.get("test-output/ScreenShots/screenshot.png")));
Here, we can see that the screenshot has captured only the element given in the locator.
4. Attaching Screenshot to Cucumber Report:
Now, we are going to discuss how to attach these screenshots to the cucumber report.
The first step is to set up your framework for the cucumber report, and this blog does a great job of explaining how to do that. This will allow you to add a screenshot to the Cucumber report using the code below. In general, this code is placed in your after hooks (AfterScenario, AfterStep, After). In the code below, I recently added a current millisecond time as the file name. However, you can customize the file names to your choice.
public void screenshots(Scenario scenario) throws IOException
    {
        WebUtil.takeScreenShots();
        long millisStart = Calendar.getInstance().getTimeInMillis();
        scenario.attach(array, "image/png",millisStart+".png" );
    }
Therefore, you can now view the Cucumber report with the screen attach to the report. while you click on the expand icon, You may see the screenshot as well.
5. Video Recording:
Now, here the playwright has the ability to record the video which will make it easier for the tester to understand their execution results. Then we’ll see how you fit that video into your report.
First, you must declare the context properties on your browser as shown in the below code. Or, you can simply update your context option where you can begin your context on the browser. Typically this method is called inside Before hooks.
Now the above code will help you to record the video and it’s going to execute the test. After that, it will automatically be stored on the path which is shown in the code. Moreover, you must see that the context of your browser is closed after it will be stored.
The below lines of code demonstrate how to convert a recorded video into bytes. These bytes can then be used to attach the recorded video to a report or perform other operations.
public static byte[] encodeVideo(Path path) throws IOException {
    FileInputStream fis = new FileInputStream(String.valueOf(path));
    ByteArrayOutputStream bos = new ByteArrayOutputStream();
    byte[] b = new byte[1024];

    for (int readNum; (readNum = fis.read(b)) != -1; ) {
        bos.write(b, 0, readNum);
    }

    byte[] bytes = bos.toByteArray();
    return bytes;
}
After recording it from your project structure, you must use the following code to attach the video to the cucumber report. The tearDown method’s execution video attaching code is described below. This code will be easier to perform once the tearDown method has been completed and your video has been recorded and attached to the report. Normally, this teardown method is written using After hooks.
Now, the screenshots and videos will appear in the cucumber report as shown in the picture below. This video will be available as part of the report.
Conclusion:
Here, we see that the playwright automation tool allows us to take several screenshots as needed. How to record Capture screenshots and videos in java playwright which can help you to identify failures’ underlying causes without having to look at the report itself.
Swapnil is an SDET with 1+ years of hands-on experience in Manual, Automation, and API testing. The technologies I have worked on include Selenium, Playwright, Cucumber, Appium, Postman, SQL, GitHub, Java, and Python. Also, I love Blog writing and learning new technologies.
What is the Robot class? and why I must use robot class in my Selenium automation framework as a Selenium automation engineer.
Hello, my name is Vishal, and in this blog, I will explain why you should use robot class. I was working on a project for one of our clients, and I was asked to test the web-file application’s upload feature. There was a button, and once we click the button, a window pop-up appeared, and I was asked to upload the file to the server of that web application. I was able to automate up until the button clicking part through selenium, but I was unable to automate the window’s pop using Selenium. I tried almost everything to automate that pop-up but failed. After doing some research, I got to know that we cannot use the Selenium application to automate the windows pop-ups.
Then I did more research on the subject and got to know about the Robot class.
What is Robot Class?
Before we start talking about how to use the robot class, we will first learn the basics of the robot class.
We deal with popups and alert many times in the java selenium web automation, using a method like a driver.switchTo(). Most of them can be easily handled using submethods like a driver.switchTo().alert().dismiss() or driver.switchTo().alert().accept() methods. But what if the pop-ups are system-generated, as shown in the following image?
As these pop-ups are not related to the webpage or browser, selenium will not be able to handle these pop-ups. In that case, we use robot class to tackle these situations.
Selenium’s Robot Class is used to enable automated testing for Java platform implementations. It generates input events in native systems for Test Automation, Self-Running Demos, and other applications that require mouse and keyboard control. It is simple to implement and integrate with an automated framework.
So this was about the introduction. In the next section of this, we will learn how to use that.
How to use robot class in selenium?
To understand how to use robot class in selenium, I am using this website. This website allows you to upload sample files.
So, before we begin automating, we must first comprehend the operation that will be carried out on this application. My primary goal here is to upload a text file from my machine’s download folder to the server of that web application. On that webpage, there is a button, and when we click it, a window appears, and I am asked to select the file that I want to upload to the server.
As previously stated, we will be able to automate up to the button-clicking stage, but we will be unable to control the windows pop-up using Selenium.
So, to control that part, we’ll use the robot class. You can use the following code.
public static void main(String[] args) throws AWTException, InterruptedException {
//Initialize the Web-driver
driver = driverSetUpForChrome();
driver.get("https://cgi-lib.berkeley.edu/ex/fup.html");
String title = driver.getTitle();
System.out.println("Title of the page is "+ title);
// Locate the upload button
WebElement uploadButton = driver.findElement(By.xpath("//form//input[@Name=\"upfile\"]"));
StringSelection s = new StringSelection("C:\\Downloads\\SampleText.txt");
// Clipboard copy
Toolkit.getDefaultToolkit().getSystemClipboard().setContents(s,null);
Actions actions = new Actions(driver);
actions.click(uploadButton).build().perform();
WebElement noteFiled = driver.findElement(By.xpath("//form//input[@Name=\"note\"]"));
actions.click(noteFiled).sendKeys("Uploading the text file.").build().perform();
WebElement pressButton = driver.findElement(By.xpath("//form//input[@type=\"submit\"]"));
actions.click(pressButton).build().perform();
}
public static WebDriver driverSetUpForChrome() {
WebDriverManager.chromedriver().setup();
WebDriver driver = new ChromeDriver();
return driver;
}
public static void quitDriver() {
driver.quit();
}
}
When you run the above code, a pop-up window similar to the one shown below will appear on your screen. The system will prompt you for a file name here. In this case, we’ll use the robot class to select the file to upload to the server.
To do so, we must first copy the file to the clipboard. Which we can do with the following line of code.
StringSelection s = new StringSelection("C:\\Downloads\\SampleText.txt");
// Clipboard copy
Toolkit.getDefaultToolkit().getSystemClipboard().setContents(s,null);
So, using the toolkit class, we copied the path to a string, which we need to paste into the pop window’s file field. We already know that we can copy and paste the content into fields by pressing the keyboard’s control and V buttons. Using the robot class, we will do the same thing.
To paste the copied file path, use the code below.
Now, after pasting the file path, we need to press the enter key to select the file. we can do with the code below.
r.keyPress(KeyEvent.VK_ENTER);
//releasing enter
r.keyRelease(KeyEvent.VK_ENTER);
We have successfully uploaded the file to the server in this manner.
So this is how we can use the robot class to handle window pop-ups.
The complete code is provided below.
//import dev.failsafe.internal.util.Assert;
import io.github.bonigarcia.wdm.WebDriverManager;
import org.openqa.selenium.By;
import org.openqa.selenium.WebDriver;
import org.openqa.selenium.WebElement;
import org.openqa.selenium.chrome.ChromeDriver;
import org.openqa.selenium.interactions.Actions;

import java.awt.*;
import java.awt.datatransfer.StringSelection;
import java.awt.event.KeyEvent;

public class SeleniumExample {


    private static WebDriver driver = null;
public static void main(String[] args) throws AWTException, InterruptedException {
//Initialize the Web-driver
driver = driverSetUpForChrome();
driver.get("https://cgi-lib.berkeley.edu/ex/fup.html");
String title = driver.getTitle();
System.out.println("Title of the page is "+ title);
// Locate the upload button
WebElement uploadButton = driver.findElement(By.xpath("//form//input[@Name=\"upfile\"]"));
StringSelection s = new StringSelection("C:\\Downloads\\SampleText.txt");
// Clipboard copy
Toolkit.getDefaultToolkit().getSystemClipboard().setContents(s,null);
Actions actions = new Actions(driver);
actions.click(uploadButton).build().perform();
Robot r = new Robot();
//pressing enter
//pressing ctrl+v
Thread.sleep(1000);
r.keyPress(KeyEvent.VK_CONTROL);
r.keyPress(KeyEvent.VK_V);
//releasing ctrl+v
Thread.sleep(1000);
r.keyRelease(KeyEvent.VK_CONTROL);
r.keyRelease(KeyEvent.VK_V);
//pressing enter
r.keyPress(KeyEvent.VK_ENTER);
//releasing enter
r.keyRelease(KeyEvent.VK_ENTER);
WebElement noteFiled = driver.findElement(By.xpath("//form//input[@Name=\"note\"]"));
actions.click(noteFiled).sendKeys("Uploading the text file.").build().perform();
WebElement pressButton = driver.findElement(By.xpath("//form//input[@type=\"submit\"]"));
actions.click(pressButton).build().perform();
}
public static WebDriver driverSetUpForChrome() {
WebDriverManager.chromedriver().setup();
WebDriver driver = new ChromeDriver();
return driver;
}
public static void quitDriver() {
driver.quit();
}
}
More about Robot Class Methods and Use:
In this section, we will learn more about the feature and its uses.
Robot robot = new Robot();
At this line, we are initializing the robot class.
keyPress():
For example robot.keyPress(KeyEvent.VK DOWN): This function is one keyword and that keyword is the name of the button that you want to press. For example, if you want to press button V then you will have to pass the following object:
KeyEvent.VK_V
mousePress():
For example, robot.mousePress(InputEvent.BUTTON3 DOWN MASK) will perform a right mouse click.
mouseMove():
For example, robot.mouseMove(point.getX(), point.getY()) will move the mouse cursor to the X and Y coordinates supplied.
keyRelease():
For example, robot.keyRelease(KeyEvent.VK DOWN): This method releases the Keyboard’s down arrow key. If there are any keys that you have pressed using the KeyPress function, then you can use this function to release those keys. – mouseRelease(): For example, robot.mouseRelease(InputEvent.BUTTON3 DOWN MASK): This method will release your mouse’s right click.
Conclusion:
So, in this way, we learned about the robot class and its application in this blog. I hope you got the information you were looking for. please share it with your testing squad, and if you have any suggestions or questions, please leave them in the comment section.
Vishal is proficient in a variety of programming languages, including Python, Java, and Javascript, C++, Jpython, C. He has also worked on a number of testing technologies, such as playright, selenium, and helenium. He is an tie loathing adventurer and thrill seeker, who believes in turning ideas into reality…
With Cypress 10 we can automate Single Sign On with Multi-Factor Authentication enabled. The new feature of Cypress 10 helps us to visit multi-domain in a single test. Now the cy.origin module helps us to do the same. We can visit the Single Sign-On site and make users authenticate and redirect to our main application domain. But usually, people find it difficult to automate Single Sign On-based applications and have multi-factor authentication for security. This Blog will help us to overcome both the challenges of Single Sign On with Multi-Factor Authentication using Cypress 10 and using a session that will make our test fast, saves time of login, and authenticate once login multiple times.
Test Goal: Automate Office 365 using Cypress 10
To Overcome both the challenges of SSO and the MFA using Cypress 10 and using session.
What are the test requirements?
Cypress 10 installed.
The secret key for Office 365 account.
And one npm package.
Let’s start the recipe.
How do I get a secret key for an office 365 account to generate OTP:
6th Choose the authenticator app option
7th Click on the link I want to use a different authenticator app
8th Click on next
9th Click on the button can’t scan the image
10th Copy the secret key and paste it and click on next.
Installing NPM packages required using one of the below methods:-
npm i -D cypress-OTP
yarn add -D cypress-OTP
Single Sign On with Multi-Factor Authentication using Cypress 10
We are all set for the next steps now next part is in VS code
Open VS code
Solution:
Go to supports/command.js
This is a custom command, we can use this command anywhere in the cypress test. We have to add parameters such as name, Email id, password, and token as a secret which we extracted for office 365 accounts. “login” is the command name we can use using cy.login()in our test.
Here we have to click on the button which navigates us to the office 365 pages where we have to authenticate the user. This landed us on the office365 SSO page.
cy.get('.microsoft').click()
The new feature for Cypress 10 is cy.origin which helps us navigate to multi-domain in the same test. Here we will pass the login URL for office 365.
Now we have to pass the secret key which we have extracted in the above steps and pass it to the OTP-generate task. This step is responsible for generating the secret.
Now we have to use this custom command in our test. Generally, we have to log in each time before the actual test. So we can use Cypress hooks ‘before’ and ‘before each’ hook.
Let’s see the code
Create a file and name it ‘beforeafter.js’ inside the Cypress folder. And paste the below Code
before(() => {
Here, we are creating the session
cy.session('1', () =>{
This is a custom command we are calling in the command.js file. It passes all required parameters like email, password, and Secret key.
We are successfully able to automate login to the application through SSO and automate MFA and reduce the login time using a session in Cypress. Here is a link to another good read around the same topic.
By profession an Automation Test Engineer, Having 3+year experience in Manual and automation testing. Having hands-on experience in Cypress with JavaScript, NodeJS. Designed automation web framework in Cypress, Webdriver.io, Selenium with jest in JavaScript. He loves to explore and learn new tools and technologies.
This article provides you with a solution for downloading a file using python and selenium in a folder. Handling files can be a tedious task at times. Especially, when you have test scenarios like downloading a file and verifying if the file is downloaded and if yes then delete the downloaded file.
Despite visiting many websites and reading many articles, I was not able to find the right solution. Here, I am providing all the solutions in one place, as visiting multiple web pages to find a single solution is tiring. Here, we are using the python and selenium combination to download a file in a folder. You can use the language you like for example, java, javascript, c#, etc. After reading this article, you will get to know how you can handle this type of scenario and we will solve this issue together. So just follow the steps described.
Traditional Approach:
When you download any file from the website it generally gets downloaded in your download folder i.e. on your local system, but here, is what we are doing we are creating a folder download in our framework. Then we download that file in this newly created folder.
Till this point, I assume you have understood the test scenario and also we will be passing the file name to delete the particular file. Also, to verify whether the particular file is getting downloaded or not.
It would help if you imported some packages of python and selenium they have listed below.
To change the download folder path from our local system to the framework folder we need to add some script here, that will set the new download folder as our default folder, to download the files from the webpage.
Step1:
Import the following packages.
from selenium import webdriver
import os
From selenium.webdriver.common.by import By
From webdriver_manager.chrome import ChromeDriverManager
After adding the above imports now we will have to change the path to do so see the script and you will get an idea.
Now we have set the download path to our new folder now we have to set the driver.
Step2:
Here, I have used the web driver manager you can use the chrome driver and provide the path if you want to. But, I suggest using web driver manager, as it is a good practice to use. Because it will download all the updated chrome driver versions automatically and you will save lots of your time.
I hope no one has any problems or doubts till this point, as these steps are crucial and if you have any doubts go through the steps again. Now you can launch your webpage URL.
Step3:
Here, I want you to write your script to locate the web element and click on that element for example refer to the following scrip
After clicking, the file will get downloaded in the new download folder that we have created in our framework.
Step4:
The next step is to see if the file is present in the newly created download folder. In order to achieve this just go through the following script.
def download_file_verify(self,filename):
       dir_path = "G:/Python/Download/"
        res = os.listdir(dir_path)
        try:
            name = os.path.isfile("Download/" + res[0])
            if res[0].__contains__(filename):
                print("file downloaded successfully")
        except "file is not downloaded":
            name = False
        return name
Here, you can provide the name of your downloaded file to the filename argument to avoid the hard coding of the script, as it is not a good practice.
Explanation:
For instance, the name of my downloaded file is extent report so now the value of the filenameargument becomes extent report.
So, first of all, it will go to the directory path we have provided now it will store all the file names already present in the folder in a list format.
Here we have stored that list in the res variable. Now we can iterate over the list and verify if our desired file is present in the folder or not.
Take note here, that the newly downloaded file will always be present in the zeroth index of our download folder. That is why we have used res[0] to check, if the downloaded file is present at the zeroth index or not.
Now, it will check if the zeroth index file name is equal to that of the name of the file we have provided. So, if yes then it will print(“file downloaded successfully”), and if not then it will throw an exception and will print(“file is not downloaded”)
Here I have used assertion to verify whether the file is downloaded or not. I will suggest you use the same as it is good practice. You will get to know the assertion while handling the file.
Congratulations, we are done with the first part. We have successfully downloaded the file in the newly created download folder. We have also verified whether the file is downloaded or not.
Step5:
The next task is to delete the downloaded file by passing the name of the file. So, let’s get started then.
Script to delete the file from the download folder by passing the name of the file.
def delete_previous_file(self,filename):
        try:
            d_path = "G:/Python/Download/"
            list = os.listdir(d_path)
            for file in list:
                print("present file is: " + file)
                path = ("Download/" + file)
                if file.__contains__(filename):
                    os.remove(path)
                    print("Present file is deleted")
        except:
            pass
Explanation:
Here, we don’t have to only delete the file that is present at the zeroth index. But we have to delete all the files present in the download folder with the same file name. So, that when a new file gets downloaded there will be only one file present.
So the above code will first go to the directory path. Store all the file names present as a list. So, now we have to iterate over that list and see if the same file is present. If yes then we have to delete that file.
Use try and except block. Here, if there is no file present, then our code will not raise any exceptions or will fail.
Congratulations now we have successfully completed the file handling with selenium python.
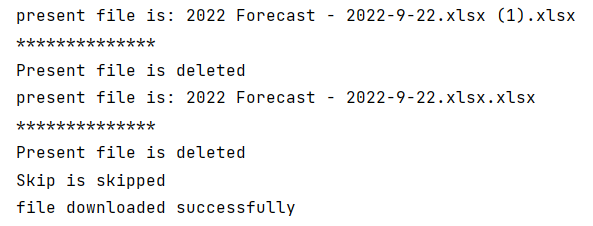
Output:
If you have any queries comment them down. We will solve that problem together like we just solved one. Also, if you have any suggestions then let me know. I will implement that in our next article. Also, don’t forget to share the article with your friends. Follow our pages on LinkedIn, Instagram, and Facebook. and subscribe to our blog. So, whenever we post some amazing content you will get to know it and, you will not have to wait for it.
In my opinion, validation of file downloading at a particular location is a very easy process. Only, if you have the right solution for reference. In this article, I am sure I have provided the right solution for all your file-downloading problems and validations.
An SDET Engineer with hands-on experience in manual, automation, API, Performance, and Security Testing. The technologies I have worked on include Selenium, Playwright, Cypress, SpecFlow, Cucumber, JMeter, K6, OWASP ZAP, Appium, Postman, Maven, Behave, Pytest, BrowserStack, SQL, GitHub, Java, JavaScript, Python, C#, HTML, CSS. Also, I have hands-on experience in CI/CD the technologies I have used for CI/CD include Azure DevOps, AWS, and Github. Apart from this, I like to write blogs and explore new technologies.
Have you ever wondered how online shopping sites such as Amazon, Flipkart, and Meesho suggest or recommend us products depending on our search or browsing history, how they do? This is because their server indexes all the information in their records so they can return the most relevant search-based results. Web crawlers use to handle this process.
Data is becoming the key to growth for any business over the past decade most successful organizations used data-driven decision-making.
with 5 billion users creating billions of data points per second. They get data primarily for price and brand monitoring, price comparison, and big data analysis that serve their decision-making process and business strategy
Web scraping/ crawling is used to find meaningful insights (Data) that will help in making decisions for business growth. Let’s see how we can achieve this.
Web scraping is used to gather a large amount of data from Websites. Doing such a thing manually is very difficult to manage because data available on the web is in an unstructured manner with the help of web scraping we can avoid this. Scraping stores data in a structured manner.
Example – Python web scraping/crawling for Flipkart
Prerequisites – We need the following lib to achieve the scraping of Flipkart, so to install these packages on your system, simply open cmd and run the following commands.
1. Pip install python 3+
2. Pip install selenium
3. Pip install requests
4. Pip install lxml
Once we install all required lib then we are good to go. Now we need to add request headers to scrap the information from the web. To find request headers on the web page follow the steps given below.
Step1:
Open the URL of the webpage you want to scrap/crawl and search for the product name in the search bar you want the information about, products list is displayed on the page, and then click on any product and right-click on the page and click on “inspect”.
Step2:
Now the Html format page is open then select the “Network” option, under this click on the first checkbox it will show all requests and response headers. Just copy the request headers that we need for scraping here.
Step 3:-
Create a python file (file name with .py extension) and import all required libraries which we are going to use.
Here create a file with name >python_scrapy_demo.py
‘sec-ch-ua’: ‘” Not A;Brand”;v=”99″, “Chromium”;v=”99″, “Google Chrome”;v=”99″‘,
‘sec-ch-ua-mobile’: ‘?0’,
‘sec-ch-ua-platform’: “Windows”,
‘Sec-Fetch-Dest’: ‘document’,
‘Sec-Fetch-Mode’: ‘navigate’,
‘Sec-Fetch-Site’: ‘same-origin’,
‘Sec-Fetch-User’: ‘?1’,
‘Upgrade-Insecure-Requests’: ‘1’,
‘User-Agent’: ‘Mozilla/5.0 (Windows NT 10.0; Win64; x64) AppleWebKit/537.36 (KHTML, like Gecko) Chrome/99.0.4844.51 Safari/537.36’ }
#write method to save html page data in the file
def save_html_page(page_data):
with open(‘flipkart_page.html’,’w+’,encoding=’utf-8′) as fl:
fl.write(page_data)
#write method to save the data in the csv file
def data_save_csv(dt):
headings={‘product_name’,’product_price’}
with open(‘flipkartdata.csv’,’a+’,encoding=’utf-8′) as file:
writer=DictWriter(file,fieldnames=headings)
writer.writeheader()
writer.writerow(dt)
file.close()
In the above code, we are saving html page and writing data into a file, and then we save that data into csv file. Here we write a method for saving html page we use the file open() method to open the file and we use “w+”,encoding=’utf-8” to write data into Unicode transformation. For extracting data (i.e here we extract product_name and product_price) follow the methods given below. We can extract the different types of data by using this code here just need to add xpath of what type of product description we need to extract and it will return the data.
We live in a world where technology continues to develop, particularly in the computer industry. The current market scenario and client demands change every second. Hence to satisfy customer needs and business growth simultaneously we need to make changes in business and it can be achieved using web scraping/crawling.
Jyotsna is a Jr SDET which have expertise in manual and automation testing for web and mobile both. She has worked on Python, Selenium, Mysql,
BDD, Git, HTML & CSS. She loves to explore new technologies and products which put impact on future technologies.