At times, certain project specifications demand comprehensive testing of a web application across a diverse range of web browsers and their varying versions. Maintaining consistent functionality, visual appearance, and user engagement is essential.
To execute this type of cross-browser testing efficiently, there are two primary approaches:
One involves manual testing, where the website is examined across multiple browsers and devices.
The other approach entails leveraging specialized tools and services that replicate distinct browser environments.
Particularly, BrowserStack stands out as a tool that has garnered considerable attention in this field, thanks to its intuitive user interface.
Executing test cases on BrowserStack is crucial for QA teams to ensure the compatibility, functionality, and performance of websites and applications across a wide range of real browsers and devices.
It helps identify bugs, responsive design issues, and user experience problems, while also supporting automated testing and real environment testing.
BrowserStack eliminates the need for local testing infrastructure, reducing costs and enhancing overall testing efficiency.
So first let’s talk about the Basic Framework where we can automate test cases using the BDD approach to execute tests on a browser on the local machine.
So for this instead of explaining it from scratch here again, You can explore my blog where I have explained How to create a BDD automation framework using Cucumber in JavaScript and Playwright.
This blog gives you step-by-step guidance on how to Create Feature files, Steps files, Page Files, and various other utilities to make the framework more reusable and robust. So here is the link to this blog: https://shorturl.at/bjuvU
You must have a BrowserStack account to execute your tests, to create a new BrowserStack account you can visit the below link. https://www.browserstack.com/users/sign_up
To get started with BrowserStack implementation first store your BrowserStack username and access key in the .env file. To get the username and access key to navigate to your BrowserStack account. Click on Access key dropdown from dashboard and you will be able to see your username and access key.
Here you will be able to see your account details. Copy your Username and Access Key and store it in a .env file as shown below. To execute tests on BrowserStack set the Browserstack variable to ‘true’.
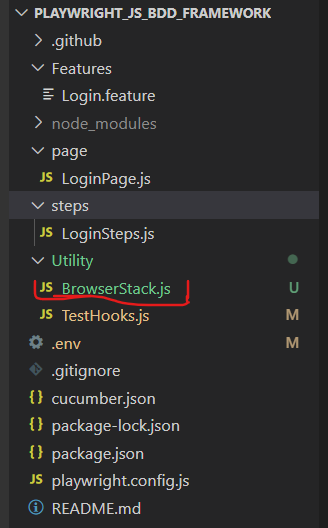
Now to set BrowserStack configurations Create a file as “Browserstack.js”, as you can see I have created a “Browserstack.js file” in the Utility folder.
Here are the essential BrowserStack configurations to integrate into this file.
The playwrightClientVersion variable is declared and assigned the output of the shell command executed using execSync from the child_process module.
.execSync('npx playwright --version’):
The command executed is npx playwright –version, which retrieves the version of the Playwright framework installed on the system. The output is converted to a string, trimmed to remove leading or trailing whitespace, and then split into an array based on spaces. The second element of the array (split(‘ ‘)[1]) represents the Playwright’s version.
caps():
This function is responsible for generating a configuration object used for browser testing with the BrowserStack platform and Playwright framework. It returns an object that contains configuration options for browser testing like browser, os, os_version, etc.
These are the variables from the .env file. If you are not using a .env file you can directly pass the BrowserStack username and access key.
As we have all the configurations ready, we will set up a test environment to execute tests on BrowserStack. Use the file where you have your Before and After methods. In the playwright-Js Framework we have these methods stored in the ‘TestHooks.js file’ so will update that file as below.
The above code Generates capabilities for BrowserStack using the caps() function from the ‘BrowserStack’ module. Construct the WebSocket endpoint URL for BrowserStack with the generated capabilities.
Now we have completed the BrowserStack implementation in our framework, now you can execute your tests on BrowserStack.
To execute tests on BrowserStack make sure you have “Browserstack = true” in the .env file.
Then you can execute your tests using the command ’npm run test’ on your terminal.
After running the test cases on BrowserStack, you’ll find the report below. Access comprehensive execution videos, and test logs for both successful and unsuccessful cases, along with execution duration.
Conclusion:
Integrating BrowserStack with Playwright JavaScript tests, gives access to a wide range of real browsers and devices, enabling comprehensive cross-browser and cross-platform testing. The scalability and cost-effectiveness of BrowserStack eliminate the need for maintaining an extensive device lab. Ultimately, this integration enhances test coverage, improves software quality, and ensures a seamless user experience across various browsers and platforms.
Priyanka is an SDET with 1+ years of hands-on experience in Manual, Automation, and API testing. The technologies she has worked on include Selenium, Playwright, Cucumber, Appium, Postman, SQL, GitHub, and Java. Also, she is interested in Blog writing and learning new technologies.
Agile methodologies are nothing but an approach or practice that applies in Software development and Project management which makes the development process more efficient and helps to maintain the quality of software. It mainly focuses on collaboration, flexibility, and adaptability in the testing process. During development, the software testing practices adhere to the agile methodology.
There are several project management tools such as Kanban, Jira, Scrum, or Extreme Programming (XP).
The core process involved in Agile development:
Define Requirements:
The product owner or analyst along with the development team collaborates with each other and identifies, analyzes, and defines the requirements. User stories are created for specific sprints to define the requirements. And these user stories are collected in the product backlog or product board.
Sprint Planning:
Sprint planning is a process in which a product goal gets defined and a plan for the upcoming sprint is defined. Developers from the development team pick a set of requirements from the product board to work on the upcoming sprint. A Sprint meeting happens and the team identifies the scope of the upcoming sprint and breaks down the requirements into tasks.
Sprint Execution:
In Sprint Execution, the development team starts working on user stories in a time-bound iteration called a Sprint. Daily scrum call meetings are conducted to discuss progress, work, and any impediments during the sprint.
Continuously Integration:
Continuously Integration is a process, where developers make changes in code and those changes are also merged in a remote repository (GitHub) and tested frequently. It automates stages of the project pipeline such as – build, test, and deployment. It helps to team working within agile development.
Agile Testing:
Testing activity occurs in the early phase of the development process. In this phase, the tester collaborates with the developer and PO to understand the requirement and also starts testing the module, and defines the acceptance criteria. Testers start preparing test scenarios and test cases based on user stories. And they execute test cases and report bugs using bug-reporting tools such as Jira.
Incremental Delivery:
In the incremental Delivery phase, a small, developed part of the software is delivered to the customer at the end of each sprint. It helps to improve the quality of software by delivering it in small parts.
Sprint Review:
The Dev team, Pos, and QAs are involved in the Sprint Review meeting. In this phase, Sprint review takes place. Here development team presents work accomplished or gives a demo of whatever they have developed in that sprint. The incomplete issues, backlog adjustments, and Action items are discussed in this meeting.
Sprint Retrospective:
The agenda of this meeting is to examine how Sprint went as far as people, requirements, relationships, processes, and tools.
Discussions Include:
What did we do well?
What should we have done better?
Identifies area for improvement
Suggestions
Actions
Let’s talk about Automated Testing:
Automated testing is an Agile practice that allows you to automate test cases through automation tools and execute the test cases to verify the functionality of software applications to meet customer expectations. It is a key aspect of agile development. Automated testing emphasizes manual testing efforts and also provides a way for continuous testing, early bug detection, and quick feedback.
Important aspects of Automated Testing:
Test Automation Framework: The team creates an automation framework using specific technology as per requirement and maintains it. It is a structured set of a rule and resources and tools which helps to create, execute, and automated the test cases. It allows us to reuse the code, in test data and also provides a way to generate test results or reports for execution.
Continuous Integration: The automation tool makes continuous integration easier when developers make changes in code and those changes are merged in a remote repository (GitHub) and tested frequently. Automated testing is an integral part of this process.
Regression Testing: Automated testing plays a vital role in regression testing. It makes sure that there should not be any unintended side effects occurring in the module when new changes have been made. Automation regression tests can be executed fast and repeatedly, giving quick feedback.
Continuous Delivery and Deployment: Automated testing allows us to run test suites to ensure that the changes made meet functional expectations and maintain the effectiveness and quality of the product. After completion of the automated testing phase, there is a Continuous Delivery process in which changes are automatically continuously deployed to the staging environment for testing. With this process code, the changes are continuously updated with the latest changes which makes faster delivery of the product in an efficient way.
Benefits of Automated Testing in Agile Methodologies:
Faster Feedback: Automated testing provides feedback quickly. It also helps in executing tests, generating results, and finding issues very quickly in the development cycle.
Increased Coverage: Automated testing allows you to create a wider range of test scenarios and test cases compared to manual tests.
Consistency-It helps to keep consistency in the execution of test cases, reducing human errors. Automated code itself needs to be tested to makes sure consistency and high quality.
Time and Cost Efficiency: Automated testing reduces human efforts and it is used in repetitive tasks, so it saves time and resources in the long run.
The working of CI/CD for automation testing in Agile:
CI/CD stands for Continuous Integration and Continuous Delivery as it is a pipeline that helps development teams to automate and makes it more efficient for building code, running tests, and also safely deploying code. The goal of the CI/CD method is to deploy code frequently and deliver working software to customers frequently and quickly.
Usually, Our source code is located on our local workstations. From there, we will commit our source code to the version control system, specifically using Git, which serves as our code management system, and is hosted on GitHub. Once the code is available in the code management system, the CI tool pulls that code automatically and builds under run unit test and then we call it Continuous integration.
During the CI process, we build and compile our source code and generate artifacts. Once these artifacts are generated, we need to deploy them on target env.
Target env may be changed based on the project necessities it may be a staging test, Dev or QA, preview, or production like various env we might have.
Now let’s take the artifacts we want to deploy on a staging environment.
Once it is deployed in the staging env we do the regression test and performance test. Once it successfully passes this test, it can be deployed to the production environment. During the deployment process, after the build, we move it into the staging environment, and if this transition to production can be achieved seamlessly without any manual intervention, we refer to it as Continuous Deployment.
In Continuous deployment, we can automatically deploy into the staging env and production environment.
Benefits of CI/CD:
Helps you to build better-quality software.
Automate the software release process for making delivery more efficient, rapid, and secure as well.
It helps you to automate repetitive tasks.
It reduces risks and makes the deployment process more predictable.
You can release software more frequently, which helps you to get fast feedback from your clients.
It gives a single view across all environments and applications.
What is Test Automation?
Test automation or automation testing is a process of automating test cases using automation tools and frameworks, managing test data, and asserting the automated result with requirements without any manual intervention. Automation testing plays an important role in achieving goals such as faster delivery, continuous integration, and frequent releases.
Benefits of Test Automation in Agile:
Faster Feedback: Automated tests can be executed quickly and also provide faster feedback on tests.
Improved Test Coverage: Automation tests allow running a large number of test cases across different environments hence it can cover different scenarios in the application.
Regression Testing Efficiency: Automation testing is mainly useful for running regression tests so it helps in repetitive testing after each code change.
Consistency and Accuracy: As automation testing is done without human intervention, it eliminates the possibility of human errors during test execution.
Benefits of Deployment Automation:
Deployment automation offers numerous benefits for software development, IT operations teams, and the entire organization. Automated deployment is a best practice in agile. Moreover, it allows developers to automate the deployment activities, development process, and testing activities. The following are the key benefits of deployment automation:
Faster and More Efficient Deployment: Automated deployment process is faster than manual deployment as it provides quick feedback. So that it reduces the time takes to release the software updates.
Consistency: Deployment automation ensures the consistency of the deployment across different environments (staging, dev, preview, production). So that it reduces the risk of configuration errors.
Reduce Human Errors: As Manual deployment involves humans which can lead to deployment errors, data loss, or other issues. So here, automation reduces such errors and increases the reliability of the deployment process.
Efficient Testing Environment: Automated deployment allows quick provisioning and teardown of the testing environment. This enables development and testing teams to work in isolation and concurrently, leading to faster testing cycles.
Cost Savings and Resource Optimization: Automated deployment reduces manual intervention which can lead to saving costs and resources.
Conclusion:
In conclusion, automated testing is an essential part of the dynamic landscape of the agile world. As we’ve explored this blog, it provides faster feedback, consistency, and accuracy, reducing risk and ensuring to delivery of high-quality software. Automation plays an important role in the form of CI/CD that helps you to build better-quality software.
Poonam is a dedicated Automation and Manual Testing professional with 2 years of experience, She is well-versed in the latest testing methodologies and tools. She has a solid foundation in programming languages such as Java, Ruby and JavaScript, and extensive experience working with automation tools such as Selenium, TestNG and Playwright, Capybara. She hold an MCS degree from Pune University, where She gained a solid foundation in computer science and programming.
Hello! In this blog, We will be exploring how to automate tests using selenium with Cucumber in Ruby.
What is Selenium?
How does the selenium web driver in Ruby work?
How to use selenium with ruby?
Ruby is a scripting language designed by Yukihiro Matsumoto, also known as Matz. It runs on a variety of platforms, such as Windows, Mac OS, and various versions of UNIX. Ruby is a pure object-oriented programming language.
Advantages of Ruby:
Open source and community support.
Flexibility.
Suitable for beginners.
Supports Web development and Desktop Applications.
Ruby is a general-purpose, interpreted programming language.
Ruby also provides a great number of helpful tools and libraries.
Ruby has a clean and easy syntax that allows a new developer to learn very quickly and easily.
What is Selenium:
Selenium is an open-source tool that automates web browsers. Selenium and Ruby can be used together, by using a gem called selenium-web driver. With this gem, you can easily automate your test cases. Selenium is a powerful tool as it supports major web browsers and supports almost all OS platforms- Windows, Linux, and Mac. You can explore selenium more on
Selenium WebDriver is a Gem that wraps the WebDriver server and makes it easier to drive a browser. WebDriver is a program that can control a web browser.
Installing selenium-web driver via gem: simply run this command on the terminal.
“gem install selenium-webdriver”
What is Ruby Gem:
Ruby gems are simply open-source libraries that contain Ruby code and are packaged with a little extra data. Using a gem allows a programmer to use the code within the gem in their program, without explicitly inserting that code.
Gems can be used for all sorts of purposes, and you can explore different gems at https://rubygems.org/. To get a better idea of what gems can do, here are a couple of popular gems and their functionality:
Bundler— Provides a consistent environment for Ruby projects by tracking and installing the needed gems and versions. It is the #1 downloaded gem of all time, but more on Bundler later.
RSpec — A testing framework that supports Behavior Driven Development for Ruby.
Devise— Devise works with authentication. For any website that needs to user login, Devise handles sign-in, sign-up, reset password, etc.
JSON — Provides an API for parsing JSON from text.
Installing Gems:
Installing gems locally is as simple as a single command: gem install [gem_name]. The install command fetches the code, downloads it to your computer, and installs the gem and any necessary dependencies. Finally, it will build documentation for the installed gems.
How to use selenium with Ruby:
In Ruby, you can create an instance of the WebDriver class by either instantiating an object or by starting a session. The instantiated object returns a session object of the WebDriver.
To instantiate a driver with the session object, we would need to do the following:
After installing ruby we need to install a few gems to start:
• gem install selenium-webdriver
• gem install selenium-cucumber
Download IDE for writing the code
• IDE : Intellij Idea Ultimate-2022.1.2
Steps to create files:
Create Project: File-New-Project
Create feature File: Right Click on project folder(Calculator)-New-Directory-features(name of folder)-Calculator.feature(File)
Create Step Definition File: Right Click on features(folder)-New-Directory-step_definitions(name of folder)-CalculatorSteps.rb(File)
Create Page File- Right Click on features(folder)-New-Directory-CalculatorPage(Folder)-Calculator.rb(File)
What is Feature File:
Feature Files are used to write acceptance steps during automated testing. A Feature File is a common file containing the feature description, scenarios, and steps for testing a feature. It serves as an entry point to the Cucumber tests. It is the file where your test scenarios are written in the Gherkin language. These files have a “.feature” extension, and users should create a separate Feature File for each software functionality.
A simple feature file consists of the following keywords/parts:
Feature − Name of the feature under test.
Description (optional) − Describe the feature under test.
Scenario − What is the test scenario?
Given − Prerequisite before the test steps get executed.
When − Specific condition which should match in order to execute the next step.
Then − What should happen if the condition mentioned in WHEN is satisfied?
We will create a project first, so click on File and choose “new project” from the menu that appears.
After creating the project we will create a feature file, so right-click on the project name and create a folder- feature and then create the file name as “Calculator. feature”.
Here is the code snippet for the feature file:]
Feature: Calculator

  Scenario: Addition of two numbers
    Given I launch calculator application
    When I click on number 4
    And I click on operator +
    And I click on second number 5
    Then I verify the result is 9
Now here all the steps are undefined, so we need to add a step definition file, so right click on the features folder and create a folder named “step_definitions” and in this folder create a file name “CalculatorSteps.rb”
What is Step Definition File:
The steps definition file stores the mapping between each step of the scenario defined in the feature file with a code of the function to be executed. So, now when Cucumber executes a step of the scenario mentioned in the feature file, it scans the step definition file and figures out which function is to be called. So for each step mentioned in the feature file (GIVEN, WHEN, THEN) which you want to execute you can write code within the step definition file.
Given(/^I launch calculator application$/) do
  @Homepage = Homepage.new(@driver)
  @Homepage.visit
end

When(/^I click on number (.*)$/) do |num1|
  @Homepage.getnum1(num1);
end

And(/^I click on operator (.*)$/) do |oprt|
  @Homepage.getoperator(oprt);
end

And(/^I click on second number (.*)$/) do |num2|
  @Homepage.getnum2(num2);
  sleep 2
end

Then(/^I verify the result is (.*)$/) do |result|
  expected_result=@Homepage.verify_result()
  expect(expected_result).to eq(result)
  puts(result)
  puts(expected_result)
  puts "result match successfully"
end
However, this is not the complete job done.
Now if you hover over a method it shows cannot find method_name, so we need to create a method for every action, so right click on the features folder and create a folder name as “CalculatorPage” and in that folder create “Calculator. rb”
Here is the code snippet for the page file where we can have all methods:
require 'selenium-webdriver'
class Homepage

  def initialize(browser)
    @driver= Selenium::WebDriver.for :chrome
    @driver.manage.window.maximize
  end

  def visit
    @driver.get "https://www.calculator.net/"
    puts "launch application successfully"
  end

  def getnum1(num1)
    @driver.find_element(:xpath,"//span[@onclick='r(#{num1})']").click
  end

  def getoperator(oprt)
    @driver.find_element(:xpath,"(//span[contains(text(),'#{oprt}')])[1]").click
  end

  def getnum2(num2)
    @driver.find_element(:xpath,"//span[@onclick='r(#{num2})']").click
  end

  def verify_result()
    @driver.find_element(:id,'sciOutPut').text.lstrip()
  end
end
What is Page File:
In the above code snippet, methods contain actions like opening the browser, visiting a website, CSS selectors, Xpaths, and actions to be performed on it (click), and verifying. Simply page file is where you write all the code in detail, all the actions you want to execute in the step definition file. By creating methods you can avoid messy code and can show only necessary things in the step definition file.
To run the feature file we need to configure the project so,
Here is the snippet for configurations:
Go to Run on the top bar and click on plus icon select cucumber and then add the following details for configurations:
After completing the configuration now run the feature file with the command on the IntelliJ terminal:
Before running this command make sure you are at the correct feature file path so here you need to move to the Calculator folder.
• cucumber features/Calculator.feature
here is the snippet of output:
Here is the cucumber report: you can get this report by running the command on the IntelliJ terminal-
cucumber features –format HTML –out reports
Conclusion:
Like Java and Python, Ruby is a general-purpose programming language. however, it focuses on simplicity, precision, and productivity. Ruby being an array-based language, is very powerful for specific uses and works particularly well with ordered datasets.
Pranali has over 1.10+ years of experience in QA, with a strong foundation in both manual and automation testing. I’m a versatile engineer skilled in Selenium, TestNG, Cucumber, Java, Ruby, POSTMAN, SitePrism, Capybara, Jira, SQL, and GitHub.